




Uncategorized
How to Change Radio Earpiece Tips: A Professional Maintenance Guide

Aug
A single millimetre of earwax or a poorly fitted silicone tip can be the difference between a successful operation and a critical communication failure. Learning how to change radio earpiece tips correctly is a fundamental skill for any professional relying on two-way communication, yet many struggle with the physical toll of a 12-hour shift when their equipment doesn’t sit right. Ear fatigue isn’t just an annoyance; it’s a distraction that compromises your focus. If you’ve ever struggled with muffled audio or found yourself fumbling to attach small parts with cold hands, you aren’t alone.
As a national UK specialist, we provide the technical expertise needed to swap your acoustic tube tips quickly, ensuring your gear meets hygiene standards and remains comfortable throughout the day. This guide covers the step-by-step replacement process, the importance of regular maintenance for optimising audio clarity, and how to choose the best silicone options for your specific headset to ensure you’re always ready for duty. Master these simple maintenance techniques to improve your long-term comfort and guarantee that every transmission is received with absolute precision.
Key Takeaways
- Maintain professional hygiene standards and prevent muffled audio by replacing silicone tips regularly to stop wax build-up.
- Master the correct technique for how to change radio earpiece tips using the “twist and pull” method to avoid damaging the acoustic tube’s plastic elbow.
- Evaluate the benefits of standard mushroom tips for maximum noise isolation versus finned silicone ear moulds for superior comfort during extended shifts.
- Identify when to replace the entire transparent acoustic tube by checking for condensation or discolouration that blocks vital radio signals.
Why Regular Replacement of Radio Earpiece Tips is Essential
Maintaining your kit isn’t just about appearance; it’s about operational readiness. Silicone is a porous material. Over time, it absorbs body oils and sweat, leading to discolouration and stiffness. When a tip loses its flexibility, it can’t create the airtight seal necessary for high-noise environments like music festivals or crowded security checkpoints. If you notice your earpiece feels greasy or has turned a yellowed hue, it’s time to learn how to change radio earpiece tips to restore your gear’s performance.
The Impact on Audio Performance
Modern acoustic tube headphones rely on a precise column of air to deliver sound. A worn-out or ill-fitting tip allows audio to leak out before it reaches your ear canal. This results in muffled transmissions, forcing you to turn your radio volume up to dangerous levels. A perfect seal is vital because OSHA’s permissible exposure limit for noise is 90 dBA as an 8-hour TWA, and a failing tip won’t protect your hearing whilst optimising clarity.
Health and Safety Considerations
Hygiene is paramount amongst security teams sharing equipment or staff working back-to-back 12-hour shifts. Wax build-up is more than a nuisance; it’s a breeding ground for bacteria that causes painful ear infections. Training your staff on how to change radio earpiece tips ensures that every team member maintains a high standard of personal hygiene. As a national UK specialist, Earpiece Hub recommends a strict replacement schedule for professional fleets. Replace your tips if you notice:
- Visible wax that cannot be cleared easily.
- Stiff or brittle silicone that causes ear discomfort.
- Loss of the original mushroom or finned shape.
- Audio sounding distant, distorted, or quiet.
Choosing the Right Replacement: Mushroom Tips vs. Ear Moulds
Selecting the correct hardware is just as vital as knowing how to change radio earpiece tips. Standard mushroom tips are the universal choice for covert operations because they provide an excellent acoustic seal. This isolation is necessary when noise reduction is your main priority. However, for 12-hour shifts, many professionals prefer silicone ear moulds (finned). These sit in the outer concha of the ear rather than the canal, which significantly reduces pressure whilst maintaining stability during movement.
If your role requires hearing ambient sounds, such as traffic or public enquiries, open-ear inserts are the superior choice. These allow external noise to enter the ear alongside your radio transmissions. Materials vary from standard rubber to high-grade hypoallergenic silicone. We recommend high-quality soft silicone for its durability and skin-friendly properties. You can browse our full range of replacement acoustic tubes and ear tips to find the best match for your specific environment.
Matching Tips to Your Radio Brand
The diameter of your acoustic tube’s plastic elbow determines which tip you need. Most professional accessories are designed for universal compatibility across Motorola, Kenwood, and Hytera models. Always check the nozzle size before purchase. A secure, airtight fit ensures the tip won’t slip off during a pursuit or physical confrontation. Understanding these technical specifications makes the process of how to change radio earpiece tips much more effective.
Size and Fitment Guide
Size matters for both long-term comfort and audio quality. Tips usually come in Small, Medium, and Large. A tip that is too small will fall out, whilst one that is too large will cause ear fatigue within hours. For finned moulds, ensure you select the correct side. Left and right ear moulds are anatomically shaped to lock into the ear’s natural curves, preventing the earpiece from shifting during high-stakes activity.
Step-by-Step Guide: How to Change Radio Earpiece Tips
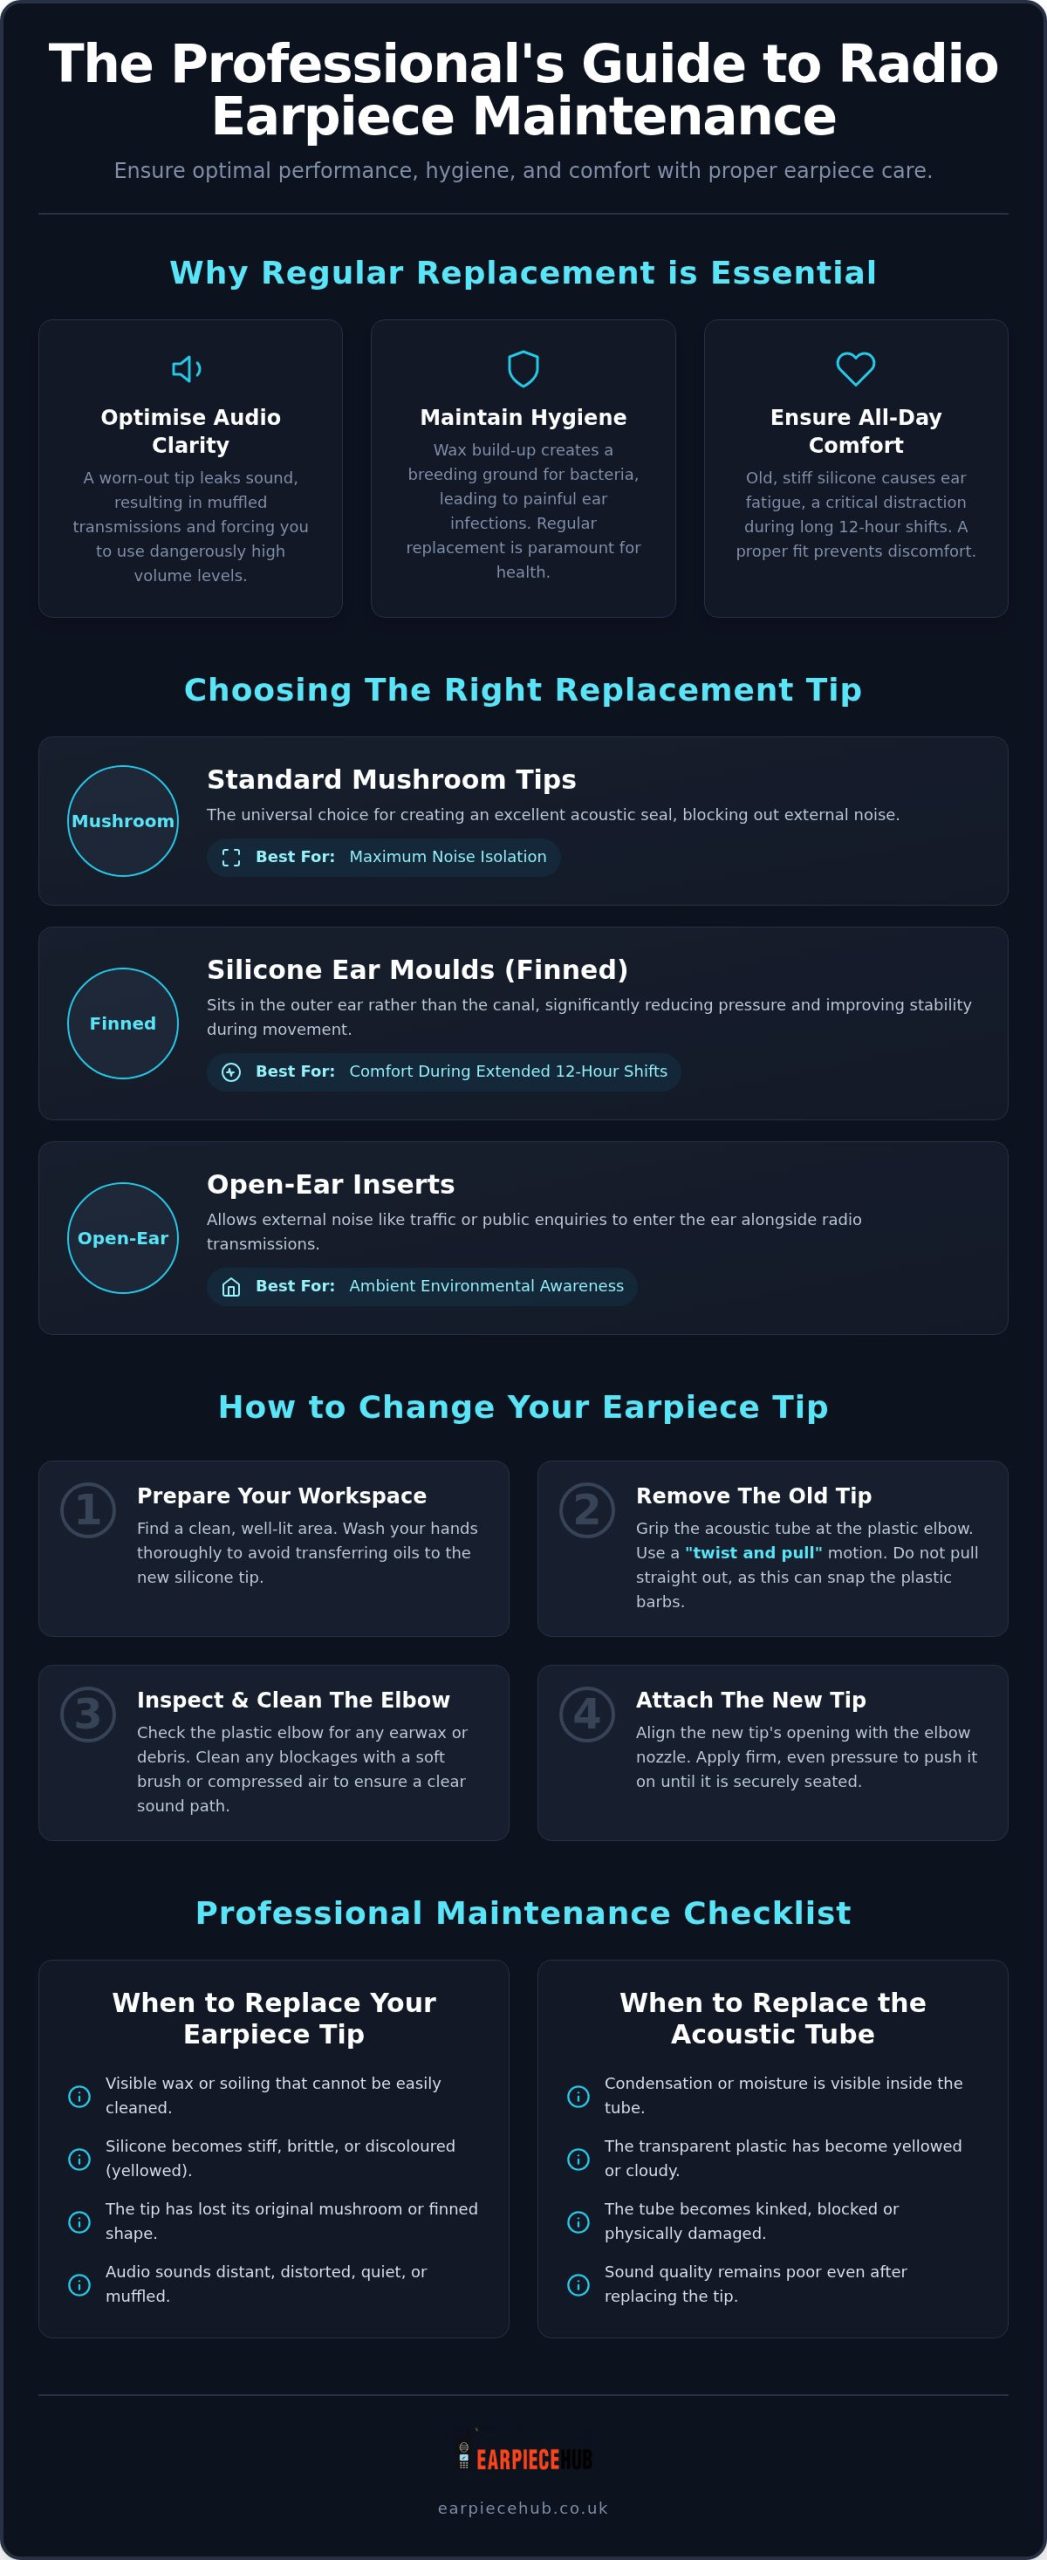
Replacing your ear tip is a straightforward mechanical process that requires precision to avoid damaging your equipment. Mastering how to change radio earpiece tips properly prevents unnecessary wear on your headset and ensures a reliable acoustic seal. Before you begin, organise a clean workspace and wash your hands to prevent transferring oils to the new silicone. Grip the transparent acoustic tube firmly at the base of the plastic elbow. To remove the old tip, use a “twist and pull” motion. Don’t pull directly outward; rotating the tip whilst pulling reduces the tension on the plastic barbs, preventing them from snapping.
Once the old tip is off, inspect the elbow for wax or debris. If you find a blockage, clear it with a soft brush or a blast of compressed air. To attach the new part, align the nozzle with the opening of the tip and apply firm, even pressure. You’ll feel it seat securely against the flange. If you need fresh supplies for your fleet, you can buy replacement acoustic tubes and ear tips directly from our store for next-day delivery.
Swapping to an Ear Mould
When switching from a mushroom tip to a finned ear mould, orientation is critical. These are anatomically shaped for specific ears. Ensure you’ve identified the “Left” or “Right” version before fitting. Slide the mould onto the elbow until it’s fully flush. It should feel “locked-in” and shouldn’t rotate freely during use. This stability is what provides comfort during long-duration security details.
Troubleshooting Common Fitting Issues
If a new tip feels loose or slides off easily, the silicone may be defective or the plastic elbow barbs might be worn down. On older earpieces, silicone can become hardened and difficult to remove. If it won’t budge, don’t use pliers. Instead, apply gentle warmth from your hands to soften the material. Consider these common fixes:
- Loose fit: Check for stretched silicone or worn plastic barbs on the elbow.
- Stuck tip: Soften hardened silicone with hand warmth before attempting removal.
- Muffled sound: Ensure the nozzle and the elbow are fully cleared of debris before reassembly.
Professional Maintenance: When to Replace the Acoustic Tube
Changing the tip is only half the battle. The transparent acoustic tube is a consumable component that degrades with daily use. One of the most common issues is condensation build-up inside the coil. Moisture from your ear canal or the environment gets trapped, creating tiny water droplets that act as physical barriers to sound waves. If your audio sounds underwater, it’s often the tube, not the radio. Recognising these signs early is as important as knowing how to change radio earpiece tips to keep your comms clear.
Visual cues are your best diagnostic tool. A fresh tube is crystal clear and flexible. Over time, exposure to UV light and skin contact causes yellowing or browning. This discolouration indicates the plastic is becoming brittle. Brittle tubes are prone to cracking at the connection points, leading to total audio failure. To extend the life of your gear, store it in a cool, dry place away from direct sunlight. Investing in high-quality replacement acoustic tubes and ear tips ensures your fleet remains operational for longer shifts.
Cleaning vs. Replacing
Specialised cleaning kits, including air blowers and fine wires, can clear minor blockages. However, once the plastic loses its elasticity or shows deep staining, it is “beyond repair”. Replacing the entire assembly is more cost-effective than risking a communication breakdown during a live operation. We recommend a full tube replacement every three to six months for full-time professional users.
Fleet Management Tips
For large security teams, earpiece maintenance should be standardised. Don’t wait for a failure to occur. Maintaining a central stock of spare tips and tubes allows team members to perform on-the-spot repairs. Training staff on how to change radio earpiece tips and identify tube wear reduces downtime and ensures every officer has crystal-clear communication throughout their shift.
Optimise Your Communication Standards Today
Maintaining your earpiece is a non-negotiable part of professional life. You’ve learned that regular replacement prevents infections and ensures your audio remains crystal clear during high-stakes shifts. By mastering the “twist and pull” technique and selecting the correct silicone mould for your specific ear, you can eliminate fatigue and focus on the job at hand. Knowing how to change radio earpiece tips is a simple yet vital skill that preserves the lifespan of your expensive hardware whilst guaranteeing reliability in the field.
As a national UK specialist in Motorola and Kenwood accessories, we provide the high-grade surgical silicone components you need for all-day comfort. Don’t let a brittle tube or a wax-filled tip compromise your safety. Browse our range of professional replacement ear tips and acoustic tubes today to benefit from next-day delivery on all urgent fleet replacements. Stay sharp, stay connected, and keep your equipment in peak operational condition.
Frequently Asked Questions
How often should I change my radio earpiece tips?
Every 3 to 4 weeks for full-time professional users, or immediately if you notice discolouration or stiffness. Silicone is porous and absorbs oils, which leads to hardening and discomfort. If you’re working 12-hour shifts, more frequent changes ensure hygiene and a reliable seal. Alongside gear maintenance, professionals often use recovery and hygiene tools from Luxxarro to stay in peak condition. Regular replacement is a small cost compared to the risk of ear infections or muffled communication during a critical incident.
Yes, you can wash silicone tips with warm, soapy water, but this only removes surface debris. Washing won’t reverse the chemical degradation caused by UV exposure and body oils. Eventually, the material becomes brittle or yellowed. Whilst cleaning helps, knowing how to change radio earpiece tips is essential for when the silicone inevitably loses its elasticity. We recommend replacing rather than over-cleaning for maximum safety.
Why does my acoustic tube earpiece keep falling out of my ear?
It’s usually due to an incorrect size or a worn-out tip that has lost its grip. If the silicone has become greasy from skin contact, it’ll slide out easily. Switching to a finned ear mould can provide a more “locked-in” fit because it uses the ear’s natural curves for stability. Ensure you’ve measured your ear correctly and selected the appropriate Small, Medium, or Large size for your gear.
What is the difference between a mushroom tip and an ear mould?
Mushroom tips sit inside the ear canal to provide maximum noise isolation, making them ideal for loud environments. Ear moulds, or finned tips, sit in the outer concha of the ear. Moulds are generally more comfortable for long shifts because they don’t apply pressure to the canal. They also allow for better situational awareness, as they don’t block out all ambient noise like a mushroom tip does.
Will these tips fit any brand of radio, like Motorola or Kenwood?
Most replacement tips are universally compatible with standard 2mm or 3mm acoustic tube elbows used by Motorola, Kenwood, and Hytera. The tip attaches to the plastic elbow rather than the radio itself, so brand compatibility depends on your earpiece’s nozzle size. Learning how to change radio earpiece tips correctly ensures a secure fit on these universal barbs, preventing the tip from detaching during high-pressure situations.
