




Uncategorized
Motorola Radio Earpiece Compatible: The Specialist Guide to Choosing the Right Audio Gear

Aug
What if the only thing standing between a successful security operation and a total communication blackout is a single, poorly chosen connector? It’s incredibly frustrating to deal with audio failure during a critical shift or to struggle with earpieces that pinch and chafe after just an hour of wear. Finding a Motorola radio earpiece compatible with your specific device shouldn’t feel like a guessing game amongst a confusing array of multi-pin and 2-pin options. You need equipment that works as hard as you do, providing total reliability when the stakes are high.
This specialist guide will help you identify the perfect audio gear for your radio, ensuring you get crystal-clear sound and a secure fit for any professional environment. You’ll learn how to distinguish between different wiring architectures and connector types with absolute confidence. We will preview the technical differences between 1-wire, 2-wire, and 3-wire systems, whilst showing you how to achieve better value for money than original manufacturer parts. From acoustic tubes to D-shape loops, we’ll help you find the right fit for your team.
Key Takeaways
- Identify the correct connector type for your device to ensure every Motorola radio earpiece compatible accessory fits securely and functions without fail.
- Understand the functional differences between 1-wire, 2-wire, and 3-wire configurations to select the best cable layout for your professional duties.
- Choose the right style for your environment, whether you need the covert nature of an acoustic tube or the stability of D-shape and G-shape designs.
- Learn professional maintenance habits, including a four-step cleaning routine, to maximise the longevity of your audio gear and maintain crystal-clear sound.
Understanding Motorola Radio Earpiece Compatibility
Selecting a Motorola radio earpiece compatible with your hardware doesn’t mean compromising on performance. In the context of professional peripherals, “compatible” refers to third-party equipment designed to meet or exceed original equipment manufacturer (OEM) standards. For fleet managers, choosing specialist compatible gear provides significant cost efficiency without sacrificing audio clarity or durability. It’s a common misconception that using third-party accessories voids your radio warranty. As long as the gear is built to the correct electrical specifications, your hardware remains protected whilst your budget goes further.
The foundation of two-way radio technology relies on a stable connection between the transceiver and the user. If the connector doesn’t match perfectly, you’ll face intermittent audio or complete communication failure. This is why identifying the exact plug type is the most critical step in your purchase journey. When you invest in a Motorola radio earpiece compatible with your specific model, you’re prioritising operational uptime.
Common Motorola Connector Types Explained
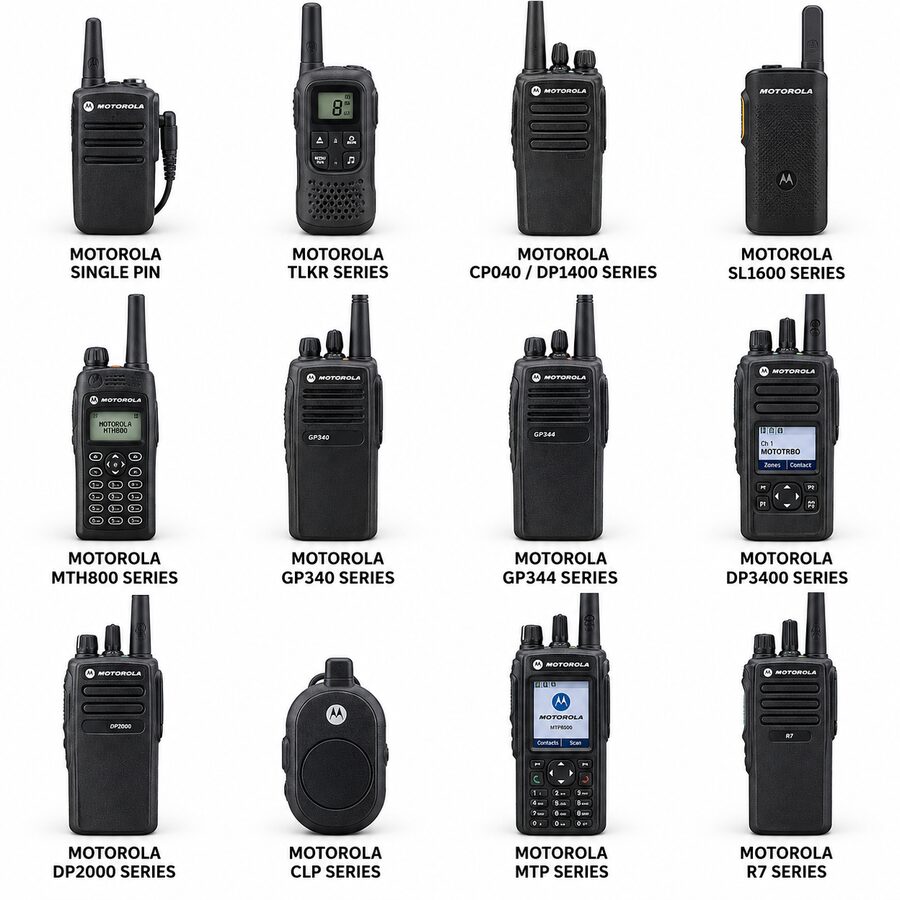
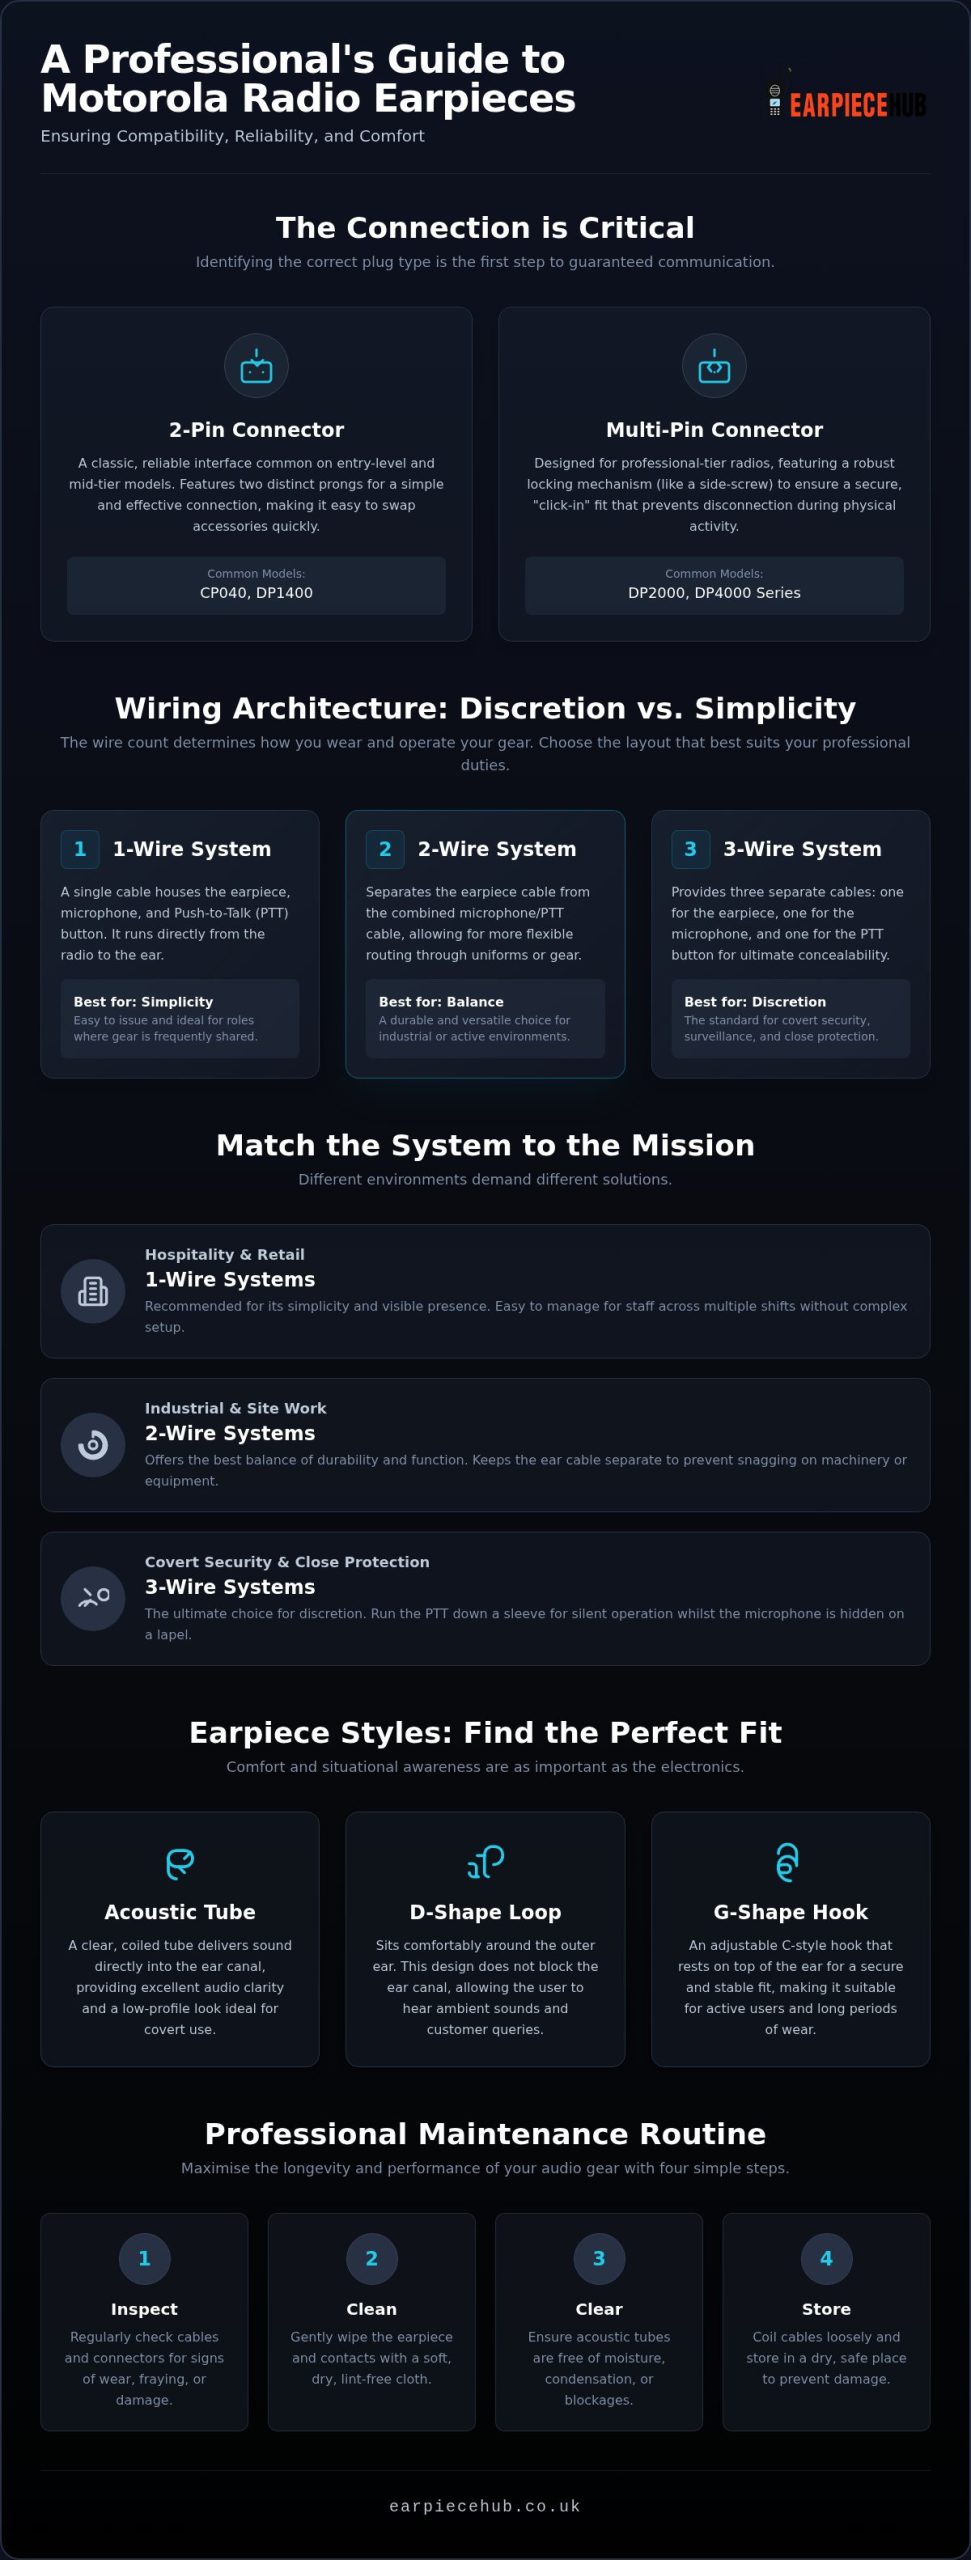
Motorola utilises several distinct interfaces across their product ranges. The classic 2-pin connector is a staple for entry-level and mid-tier models like the CP040 and DP1400. It features two metal prongs of slightly different diameters, providing a simple yet effective interface for standard security duties. It’s reliable, easy to swap, and widely available.
For professional-tier series such as the DP2000 and DP4000, Motorola uses more complex multi-pin connectors like the M1 or M7. These often include a side-loading screw or a heavy-duty locking mechanism to ensure a secure, “click-in” fit. This physical security is vital; it prevents the earpiece from jarring loose during physical movement or tactical manoeuvres. A secure connection is the only way to prevent audio dropouts in high-pressure environments where every second counts.
Decoding the Tech: 1-Wire, 2-Wire, and 3-Wire Systems
Understanding wiring architecture is essential for choosing a Motorola radio earpiece compatible with your daily duties. The “wire” count refers to the number of separate cables originating from the radio connector. In a 1-wire system, the Push-to-Talk (PTT) button and microphone are integrated into a single housing. This unit sits on the main cable running from the radio to the ear. It’s straightforward. A 2-wire system separates the earpiece from the microphone and PTT, allowing you to route wires through sleeves or under jackets. For maximum discretion, 3-wire systems provide three distinct cables for the ear, the mic, and a separate PTT button. The number of wires in your system directly determines how easily you can conceal your communication gear beneath clothing whilst maintaining full operational control.
Which Wiring Architecture Suits Your Role?
Your specific work environment dictates which setup is most efficient for your team. Selecting the correct Motorola radio earpiece compatible wiring prevents cable snags and ensures your staff can communicate without hindrance. You’ll find that different industries prioritise either speed of deployment or total discretion.
- Hospitality and retail: 1-wire systems are often the best choice here. They are easy to issue to staff and provide a clear, visible presence that doesn’t require complex routing through uniforms.
- Close protection and covert security: 3-wire surveillance kits offer a significant tactical advantage. You can hide the microphone on a lapel and run the PTT wire down a sleeve to your palm for silent, invisible operation.
- Industrial use: 2-wire setups offer the best balance. They are durable enough for warehouse or site work, allowing the mic to be clipped securely to a collar whilst keeping the ear cable separate to prevent snagging.
If you’re unsure which configuration fits your radio model, you can browse our full range of professional audio gear to find the right match.
Choosing the Right Style: Acoustic Tube vs D-Shape vs G-Shape
The physical design of your audio gear is just as vital as the internal wiring. When selecting a Motorola radio earpiece compatible with your specific role, you must balance long-term comfort with situational awareness. Each style offers unique advantages depending on your work environment and the level of interaction required with the public.
D-Shape earpieces feature a secure loop that sits around the outer ear. They are ideal for busy retail or hospitality settings because they don’t block the ear canal. This allows you to hear ambient noise and customer queries whilst staying connected to your team. G-Shape earpieces, often called ear-hooks, provide a flexible fit for long shifts. Their open design is easy to wipe down and sanitise; they are the preferred choice for organisations where equipment is shared amongst staff members.
Regardless of the physical style, transducer quality is the defining factor for performance. A high-grade transducer ensures audio remains crisp and intelligible even in high-decibel environments. It prevents the thin, distorted sound often associated with low-quality alternatives, ensuring you never miss a vital transmission.
The Benefits of Acoustic Tube Earpieces
Acoustic tubes are the industry standard for covert security and door supervision. The clear, coiled tube delivers sound via air pressure, providing a discreet profile that is almost invisible from a distance. This “surveillance” look is essential for professionals who must maintain a low profile whilst on duty.
These units offer excellent hygiene and longevity. You can replace the ear tip or the clear tube itself if they become blocked with wax or moisture, extending the life of the electronic components. This modularity makes them a cost-effective choice for professional fleets. Shop our full range of acoustic tube earpieces for Motorola radios to upgrade your team’s kit today.
Maintenance and Longevity of Your Radio Accessories
Ensuring your Motorola radio earpiece compatible equipment lasts through demanding shifts requires a disciplined maintenance routine. Neglecting your gear leads to audio degradation and premature failure. To keep acoustic tubes clear, follow this four-step cleaning process: detach the tube from the transducer; flush with warm, soapy water; use a compressed air duster to remove stubborn wax; and leave to air-dry completely. This prevents the muffled sound caused by build-up within the tube.
Wire fatigue is a common issue caused by improper storage. Avoid wrapping cables tightly around the radio body, as this stresses the internal copper filaments. Look for fraying near the connector or intermittent audio when the wire flexes. Replacement ear tips are also vital; they maintain the acoustic seal for clear sound whilst ensuring personal hygiene. Earpiece Hub serves as your central resource for these essential maintenance parts, including fresh ear tips and a replacement battery for the Motorola DP1400.
Preventing Audio Failure in Professional Environments
One of the most frequent causes of sudden silence is moisture lock. This occurs when condensation from body heat forms droplets inside the clear tube, blocking the air path. A quick flick of the tube or a blast of air usually restores sound instantly. Maintaining a Motorola radio earpiece compatible setup also means regularly inspecting the connector pins. Debris or oxidation on the metal contacts can cause crackling audio or failed transmissions. Use a dry, lint-free cloth to keep these surfaces polished and ensure a solid connection.
Knowing when to retire your gear is just as important as cleaning it. Replace your earpiece if you notice any of these indicators:
- The acoustic tube has turned yellow, brittle, or lost its flexibility.
- There is visible cable strain or exposed wiring near the connector.
- Audio remains distorted or quiet despite thorough cleaning of the transducer.
- The connector no longer clicks firmly into the radio port, leading to dropouts.
Upgrade Your Professional Communication Strategy
Reliable audio is the backbone of any successful security or hospitality operation. By matching your connector type correctly and selecting the right wiring architecture for your specific role, you eliminate the risk of communication failure when it matters most. Whether you require the discreet profile of an acoustic tube or the shared hygiene benefits of a G-Shape loop, choosing a Motorola radio earpiece compatible solution ensures your team stays connected with absolute clarity.
Maintenance remains the final piece of the puzzle; regular cleaning and proper storage prevent common issues like moisture lock and wire fatigue. As a specialist UK-based provider, Earpiece Hub offers expert support and next-day shipping on industry-standard 1, 2, and 3-wire configurations. Don’t settle for expensive OEM parts when you can get superior value and performance from a trusted partner. Shop our full range of Motorola compatible earpieces at Earpiece Hub and equip your fleet with the very best gear today.
Frequently Asked Questions
How do I know if an earpiece is compatible with my Motorola radio?
You must check the connector type and the radio model number against the technical specifications of the accessory. Motorola uses specific pins like the M1 multi-pin or the standard 2-pin layout. A Motorola radio earpiece compatible with a DP1400 won’t fit a DP4400e due to these physical differences. Always verify the connector pin configuration before purchase to ensure a secure, functional fit for your specific device.
What is the difference between a 1-wire and a 2-wire Motorola earpiece?
A 1-wire system combines the microphone and the Push-to-Talk button into a single unit on the main cable. In contrast, a 2-wire system separates these components, allowing the microphone and PTT to be routed down a sleeve whilst the earpiece cable runs directly to the ear. This separation provides greater flexibility and discretion for security personnel who need to hide their communication equipment under professional uniforms or jackets.
Are compatible earpieces as good as genuine Motorola ones?
High-quality compatible earpieces are designed to meet or exceed original equipment manufacturer standards whilst offering better value for money. These professional-grade peripherals use durable transducers and reinforced cabling to ensure crystal-clear audio in demanding environments. Choosing a specialist Motorola radio earpiece compatible accessory allows fleet managers to maintain high communication standards without the premium price tag associated with genuine branded parts.
Can I use a 2-pin earpiece on a multi-pin Motorola radio?
You can’t plug a 2-pin earpiece directly into a multi-pin radio port because the physical interfaces are entirely different. You’d require a specific earpiece adapter to bridge the connection between the two standards. However, it’s generally more reliable to purchase an earpiece with the correct native connector for your radio series to avoid adding bulk and potential points of failure to your professional audio setup.
How do I clean my acoustic tube earpiece safely?
Detach the clear acoustic tube from the electronic transducer before cleaning with warm, soapy water. Use a small air blower or compressed air to clear moisture and wax from the coiled section. Ensure the tube is completely dry before reattaching it to prevent moisture from damaging the speaker component. Regular cleaning prevents moisture lock and maintains the hygiene of your equipment during long shifts.
