




Uncategorized
How to Wear a Radio Earpiece Correctly: A Professional Guide

Aug
A loose earpiece isn’t just a minor distraction; it’s a critical failure point that can compromise your entire team’s security during a high-pressure shift. Most professionals in the UK security and events industry have dealt with the stinging ear fatigue or the frustration of a wire snagging on a door handle at the worst possible moment. You don’t have to sacrifice comfort for reliability. Learning how to wear a radio earpiece correctly ensures a secure, covert fit that remains comfortable for a full 12-hour rotation without irritation or audio interference.
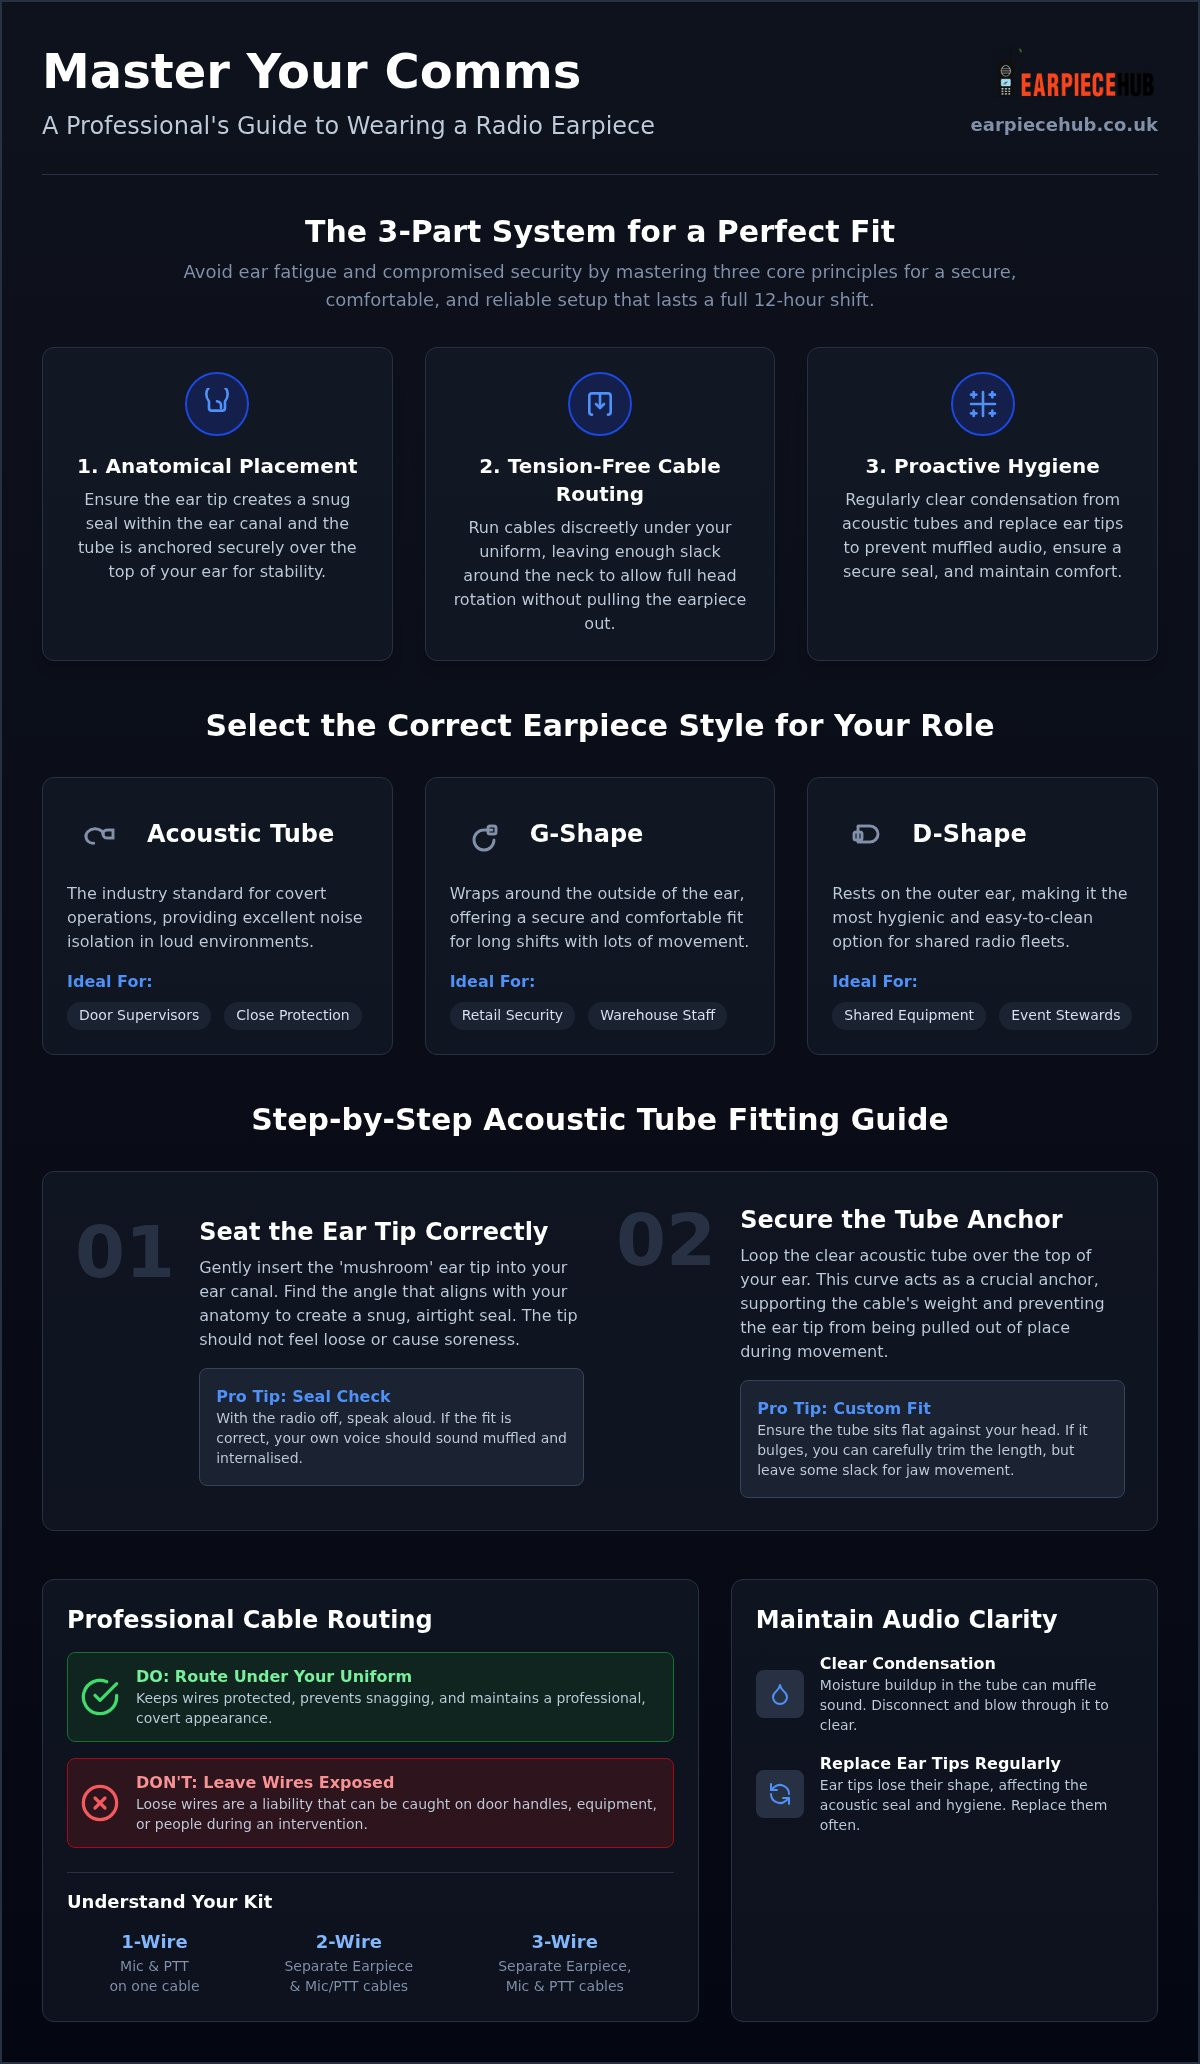
Whether you’re using a D-shape, G-shape, or a specialist acoustic tube, the secret lies in a three-part system: anatomical placement, tension-free cable routing, and proactive hygiene. This guide provides a professional walkthrough on fitting your equipment, routing wires through your uniform, and maintaining your ear tips for crystal-clear communication. We’ll examine the technical differences between various wire configurations to help you master your kit like a seasoned industry veteran.
Key Takeaways
- Identify whether an acoustic tube, G-shape, or D-shape model is the best choice for your operational environment.
- Master how to wear a radio earpiece correctly by using the top of your ear as a secure anchor point for stability.
- Optimise your setup by routing cables under your uniform with enough slack to allow for full head rotation without pulling.
- Prevent muffled audio and ear fatigue by clearing condensation from tubes and replacing ear tips regularly.
Selecting the Correct Earpiece Style for Your Role
Choosing the right hardware is the foundation of learning how to wear a radio earpiece correctly. Your operational environment dictates whether you need a covert acoustic tube or a more accessible over-ear G-shape or D-shape model. At Earpiece Hub, we provide specialist peripherals for major radio brands, including:
- Motorola (including DP1400 accessories)
- Kenwood
- Hytera
Technical compatibility is essential. Using a mismatched connector can lead to poor audio quality or hardware damage. Selecting the right style is the first step in mastering how to wear a radio earpiece correctly for maximum comfort.
When to Choose an Acoustic Tube Earpiece
The acoustic tube remains the gold standard for door supervisors and close protection officers. Its transparent design offers a professional, covert appearance that blends into a suit or uniform. The soft “mushroom” ear tip is the key to its performance, providing excellent noise isolation by creating a snug seal in the ear canal. This setup is ideal for high-decibel environments where hearing a colleague’s message over loud music or crowds is a safety requirement. We recommend stocking replacement ear tips to maintain both hygiene and the quality of the acoustic seal.
G-Shape vs D-Shape: Comfort for Long Shifts
For staff in retail or warehouse roles who may find in-ear tips uncomfortable, over-ear styles offer a functional alternative. The G-shape earpiece is designed to “wrap” around the ear, providing a secure anchor point that stays put during vigorous physical activity. It won’t slip even if you’re moving quickly across a large site. Alternatively, the D-shape earpiece is the most hygienic option for shared radio fleets. Since the speaker rests against the outer ear rather than inside the canal, it’s much easier to sanitise between users. These models are often available in 1-wire or 2-wire configurations to suit your specific cabling needs.
Step-by-Step Guide to Fitting an Acoustic Tube Earpiece
Fitting your kit properly is the difference between a secure shift and a constant distraction. To understand how to wear a radio earpiece correctly, you must treat the fitting as a precision task rather than a quick fix. A well-fitted acoustic tube provides the stability needed for high-stakes environments and ensures your focus remains on the task at hand.
Seating the Ear Tip Correctly
Gently insert the ‘mushroom’ ear tip into your ear canal until you achieve a snug, airtight seal. Don’t just push it in. Find the specific angle that aligns with your ear anatomy to prevent the tip from popping out during sudden movements or speech. If the fit feels loose or causes immediate soreness, you likely need a different size. We stock replacement acoustic tubes and ear tips in various sizes to ensure a bespoke fit for every professional. To verify the seal, speak a few words aloud whilst the radio is switched off; your own voice should sound muffled or internalised if the fit is correct.
Securing the Acoustic Tube Anchor
Once the tip is seated, loop the clear acoustic tube over the top of your ear. This natural curve acts as a vital anchor point, supporting the weight of the cable and preventing the tip from being pulled out of place. Adjust the ‘twist’ of the tube where it meets the speaker housing to ensure it sits perfectly flat against the side of your head. If the tube bulges outward or pulls tightly against your skin, it’s either too long or too short. You can trim the tube length with sharp scissors for a custom fit, but always leave a small amount of slack to account for jaw movement and comfort.
Professional Cable Routing and Lapel Clip Placement
Correct fitting doesn’t end at the ear. To understand how to wear a radio earpiece correctly, you must manage the cabling that connects your hardware to the radio unit. Loose wires are a liability. They snag on door handles, equipment, or even other people during a physical intervention. Always route your main cable underneath your shirt or jacket. This keeps the setup discreet and protected from external interference. Leave enough slack near the neck to allow for full head rotation. If the wire is too tight, it will pull the earpiece out every time you look over your shoulder.
The complexity of your routing depends on your kit. A 1-wire setup features a combined mic and PTT on a single cable, whereas a 2-wire kit separates the earpiece from the microphone. If you need a high-performance professional setup, shop our range of 1, 2, and 3-wire covert kits designed for UK security standards.
Managing 2-Wire and 3-Wire Covert Kits
In a 2-wire configuration, professionals often route the microphone wire down their sleeve. This allows for discreet ‘cuff mic’ communication, where you can speak into your wrist without drawing attention. For 3-wire kits, the PTT button is separate again. This is typically secured to the waistband or belt, providing a tactile, easy-to-reach trigger point that remains hidden under a blazer or jacket. Mastering these configurations is part of knowing how to wear a radio earpiece correctly in sensitive environments.
The Importance of Lapel Clips
Never let the weight of the cable hang directly from your ear. Use the provided lapel clips to anchor the wire to your clothing. This transfers the weight to your garment, significantly reducing ear fatigue over an 8-12 hour shift. Proper clipping also prevents ‘cable rustle.’ If a wire is loose, it rubs against your clothing, creating static and friction noise that can muffle your outgoing audio during critical transmissions.
Maintaining Comfort and Audio Clarity Throughout Your Shift
Learning how to wear a radio earpiece correctly involves more than just the initial setup; it requires proactive management of your gear throughout a long shift. Ear fatigue is the physical soreness or cognitive distraction caused by prolonged pressure on the ear canal, which can significantly reduce your situational awareness and professional performance. To prevent this, try alternating the earpiece between your left and right ear every few hours if your role allows. Even a slight adjustment to the angle of the ear tip can relieve pressure points and extend your comfort. Don’t ignore the signs of wear.
Cleaning and Moisture Management
Condensation is a common issue for security professionals, especially when moving between cold outdoor environments and warm indoor venues. Moisture build-up inside the acoustic tube acts as a physical barrier, leading to muffled or distorted audio. Use a dedicated air blower to clear the tube regularly; never blow into it with your mouth, as this introduces more moisture and bacteria. For daily hygiene, wipe down the ear tip and speaker housing with alcohol-free wipes after every shift to prevent wax build-up and skin irritation. This simple routine ensures that your equipment remains as functional as the day you bought it.
When to Replace Your Accessories
Even with meticulous care, peripherals have a finite lifespan. Inspect your acoustic tube for signs of discolouration or brittleness; a yellowed or hardened tube will lose its flexibility and compromise the seal. We recommend replacing ear tips every 3-4 months to maintain hygiene and comfort. Additionally, ensure your radio is performing at its peak. A fresh replacement battery for Motorola DP1400 or Hytera units ensures consistent power is delivered to the transducer, maintaining audio clarity even at the end of a 12-hour rotation. Knowing how to wear a radio earpiece correctly includes recognising when your equipment is no longer fit for purpose and requires a professional replacement.
Upgrade Your Operational Communication
Mastering how to wear a radio earpiece correctly transforms your daily operational experience from a frustrating struggle into a seamless professional routine. By prioritising anatomical placement, tension-free cable routing, and consistent hygiene, you ensure that your communications remain crystal clear during every hour of your shift. These small technical adjustments prevent equipment failure and ear fatigue when you need your focus most. Reliability is the foundation of effective security.
As a specialist UK retailer since 2015, Earpiece Hub understands the high-stakes nature of security and radio communication. We support your team with next-day shipping on all professional accessories and 24/7 technical support to keep your kit operational. Don’t let poor equipment or incorrect fitting compromise your safety on the frontline.
Shop our professional range of Acoustic Tube Earpieces at Earpiece Hub and equip yourself with the standard of gear your role demands. Stay secure, stay comfortable, and stay connected throughout your rotation.
Frequently Asked Questions
Why does my radio earpiece keep falling out when I move?
Your earpiece likely lacks a proper anchor point or uses an incorrectly sized ear tip for your anatomy. Ensure the acoustic tube is looped over the top of your ear to support the cable’s weight effectively. If you haven’t mastered how to wear a radio earpiece correctly, check that your clothing clips are taking the tension off the wire. A loose cable will pull the tip out during sudden movement.
Which ear should I wear my radio earpiece in?
Most professionals choose their non-dominant ear to keep their dominant hand free for other tasks or defensive manoeuvres. You should consider your specific environment and which side your radio is mounted on to minimise cable crossing. If you suffer from ear fatigue during long shifts, alternating ears is a common industry practice to maintain comfort and situational awareness throughout your full rotation.
How do I stop my acoustic tube from getting condensation inside?
Condensation occurs when warm air from your ear meets the cooler external tube, often during outdoor shifts. To stop moisture build-up, use a dedicated air blower to clear the tube at the end of every shift. Avoid blowing into the tube with your mouth, as this introduces saliva and bacteria. Regularly disconnecting the tube from the transducer allows it to air out and prevents muffled audio quality.
Can I wear a radio earpiece with glasses or a hat?
You can wear an earpiece with glasses or headwear by carefully routing the acoustic tube under the arms of your spectacles. This prevents the tube from being pinched, which would otherwise muffle the sound. When wearing a hat or helmet, ensure the cable routing remains flat against your head to avoid uncomfortable pressure points. Knowing how to wear a radio earpiece correctly with accessories ensures your communication remains reliable.
How often should I replace the ear tips on my earpiece?
Replace your ear tips every three to four months to maintain hygiene and a proper acoustic seal. Over time, the silicone or plastic can become porous, trapping bacteria and earwax that can lead to infections. If the tip becomes discoloured, brittle, or loses its shape, it is time for a replacement. Regularly swapping tips ensures your kit remains comfortable and provides the noise isolation required for high-pressure environments.
