




Uncategorized
Why is My Radio Earpiece Muffled? Troubleshooting and Fixes

Jul
You’re halfway through a high-pressure shift when a critical instruction crackles through your radio, but instead of clear orders, you hear nothing but a distorted, underwater hum. It’s a situation that isn’t just frustrating; it’s a genuine safety risk that leaves you isolated when you need your team most. You’re left wondering, “why is my radio earpiece muffled?” at the exact moment you can’t afford a communication breakdown whilst on duty.
We understand that for security professionals, your gear is your lifeline. When your audio quality dips, it doesn’t just hinder your performance; it compromises the safety of everyone on site. This article will help you discover the exact causes of muffled radio audio and provide professional steps to restore crystal-clear communication immediately. We’ll preview essential maintenance for acoustic tubes and connector pins, helping you decide if a quick fix will work or if it’s time to buy a reliable replacement from our specialist range.
Key Takeaways
- Learn how to isolate audio faults by performing a “Speaker Test” to determine if the issue lies with your radio settings or the earpiece hardware.
- Identify common physical causes for “why is my radio earpiece muffled,” such as earwax build-up in the ear tip or condensation within the acoustic tube.
- Discover how to inspect multi-pin connectors for corrosion and identify internal cable strain before it leads to a total communication failure.
- Master professional maintenance habits, including proper cable organisation and dry storage, to prevent audio dampening during your shift.
- Understand when to repair your equipment with replacement acoustic tubes and when it is more cost-effective to upgrade to a new G-shape or D-shape earpiece.
Troubleshooting Muffled Audio: Is it the Radio or the Earpiece?
Most professionals assume a failing cable or a blocked tube is the primary culprit when audio turns muddy. However, before you start scrubbing components or ordering replacements, you must verify the source of the failure. If you’re currently asking why is my radio earpiece muffled, the answer might actually lie within the radio handset itself rather than the accessory. Identifying the root cause early prevents you from wasting time on fixes that won’t work.
The fastest way to isolate a hardware fault is through a simple swap test. If you’re working in a team, try connecting your earpiece to a colleague’s radio. If the audio clears up, your radio settings or hardware are to blame. If the sound remains distorted, the earpiece is definitely the issue. You should also consider environmental factors. Modern headphone and earpiece technology can occasionally suffer from “Cross-Talk” or electromagnetic interference if you’re working near high-voltage server rooms or heavy machinery.
The Isolation Test: Step-by-Step
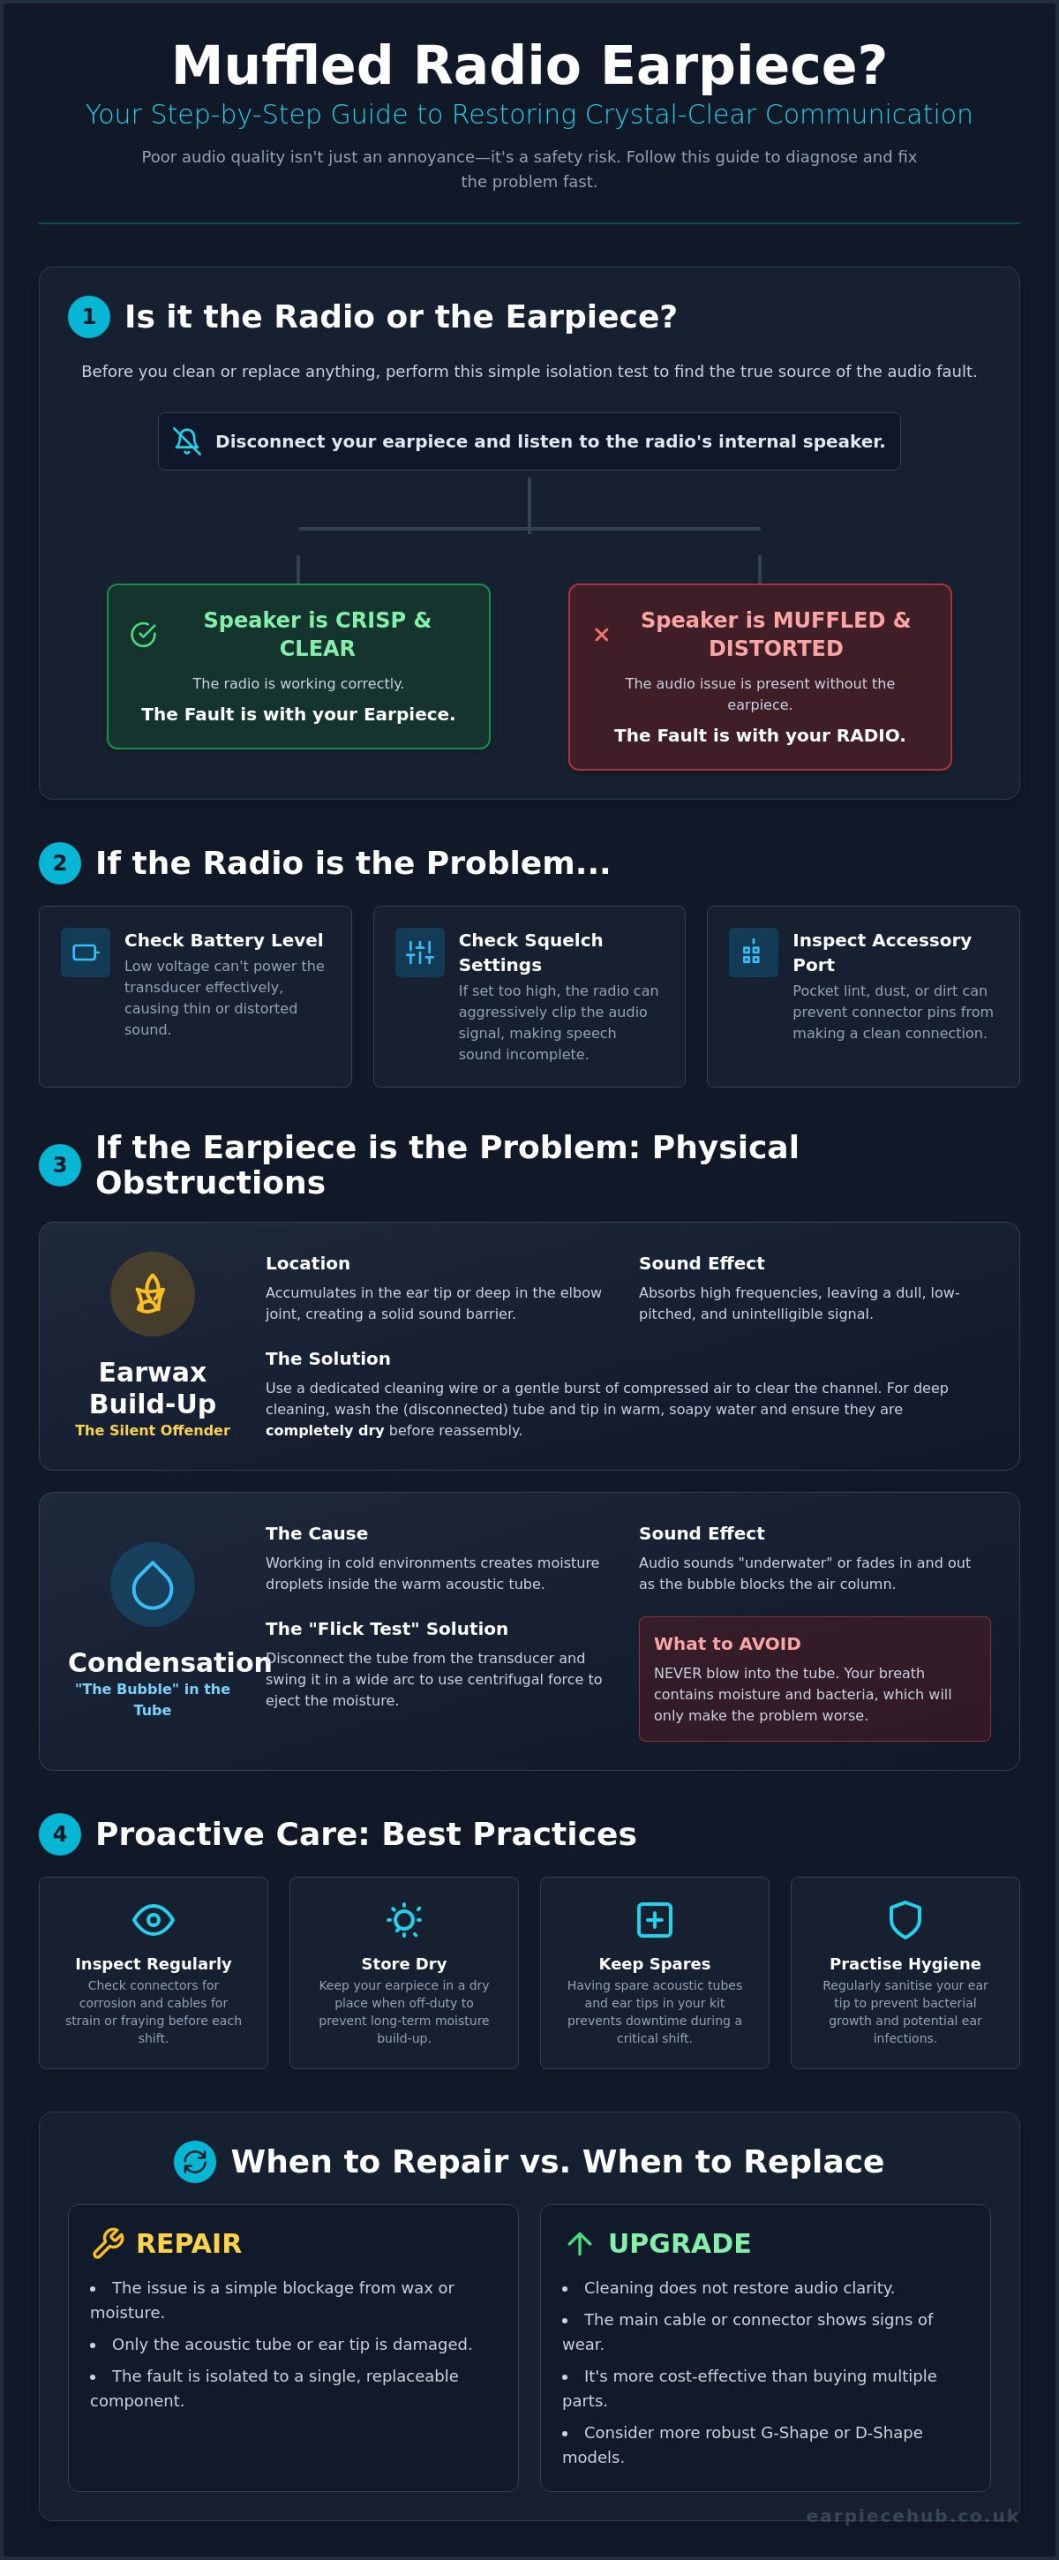
Start by disconnecting your accessory whilst the radio is powered on. Listen closely to the radio’s internal speaker for the standard power-up “chirp” or an incoming transmission. If the internal speaker sounds crisp and sharp, the radio’s processing unit is functioning correctly. Reconnect your earpiece and check if the muffled sound returns immediately. This basic sequence confirms whether the issue is a physical blockage in the earpiece or an electronic failure in the radio’s accessory port.
Checking Radio Settings and Battery Levels
Don’t overlook the basics of power and configuration. Low battery voltage is a frequent cause of distorted audio. When a battery drops below a certain threshold, it may lack the power to drive the earpiece’s transducer effectively, resulting in “thin” or underwater sound. Check your squelch settings as well. If the squelch is set too high, the radio might aggressively clip the signal, making speech sound muffled or incomplete. Finally, inspect the accessory port for pocket lint or dust. Even a tiny amount of debris can prevent the connector pins from making a clean, high-fidelity connection, which directly impacts your audio clarity during a shift.
Clearing Physical Obstructions: Earwax and Condensation
Physical obstructions are the most common reason for audio degradation in the field. If your isolation test from the previous section confirmed the earpiece is the issue, you likely have a blockage. Earwax is a silent offender. It frequently accumulates at the ear tip or deep within the elbow joint where the clear tube meets the transducer. This creates a solid barrier that absorbs high-frequency sounds, leaving you with a dull, unintelligible signal. If you’re still asking why is my radio earpiece muffled after checking your settings, a physical inspection is your next priority. Use a dedicated cleaning wire or a quick burst of compressed air to keep the channel open.
Hygiene isn’t just about clear audio; it’s about health. Sanitising your equipment regularly prevents bacterial growth that can lead to painful ear infections. Following safe listening practices ensures you aren’t cranking the volume to compensate for a dirty earpiece, which can cause long-term hearing damage. If your current set is beyond a simple clean, it might be time to browse our Replacement Acoustic Tubes and Ear Tips to restore your gear to factory standards. Keeping spares in your kit bag is a professional habit that prevents downtime during critical shifts.
Dealing with “The Bubble”: Moisture in the Tube
Working in cold environments whilst wearing a warm earpiece creates the perfect conditions for condensation. This moisture forms tiny droplets, often called “the bubble,” which block the air column needed for sound to travel. You’ll notice the audio starts to sound underwater or fades out entirely. Try the “Flick Test” by disconnecting the tube from the radio and swinging it in a wide arc to force the moisture out. Never blow into the tube with your mouth. Your breath is naturally humid and will only introduce more moisture and unwanted bacteria into the system, making the problem worse.
Professional Cleaning for Acoustic Tubes
Deep cleaning requires a methodical approach. Remove the clear tube from the transducer by firmly twisting the plastic connector. You can wash the tube and ear tip in warm, soapy water to dissolve stubborn wax and oil. Keep all electronic components and the transducer unit completely dry during this process. The tube must be 100% dry before reconnection. Any remaining water will immediately muffle the sound or could even damage the sensitive transducer once you resume your shift. If the tube has turned yellow or brittle, no amount of cleaning will fix the audio, and a replacement is necessary.
Inspecting for Hardware Damage and Connection Issues
If cleaning the acoustic tube hasn’t resolved the issue, you must look closer at the electrical components. Hardware failures often manifest as a gradual loss of clarity rather than a total blackout. When troubleshooting why is my radio earpiece muffled, many users overlook the physical integrity of the electrical contacts. A single bent or corroded pin in a multi-pin connector can degrade the signal quality significantly. This results in audio that sounds distant, fuzzy, or low-volume despite having the radio turned up to its maximum setting.
Cable strain is another frequent culprit for poor performance. Check the areas where the wire meets the plug and the microphone housing. These stress points are prone to internal wire breaks caused by constant movement during a shift. If the internal copper shielding is compromised, you’ll experience intermittent audio or a muffled tone that changes when you move your head. Ensure the earpiece is seated correctly in the radio accessory port; a loose connection is often the simplest reason for distorted sound. If the plug isn’t flush against the radio body, the pins cannot transfer a clean signal.
Connector Pin Maintenance
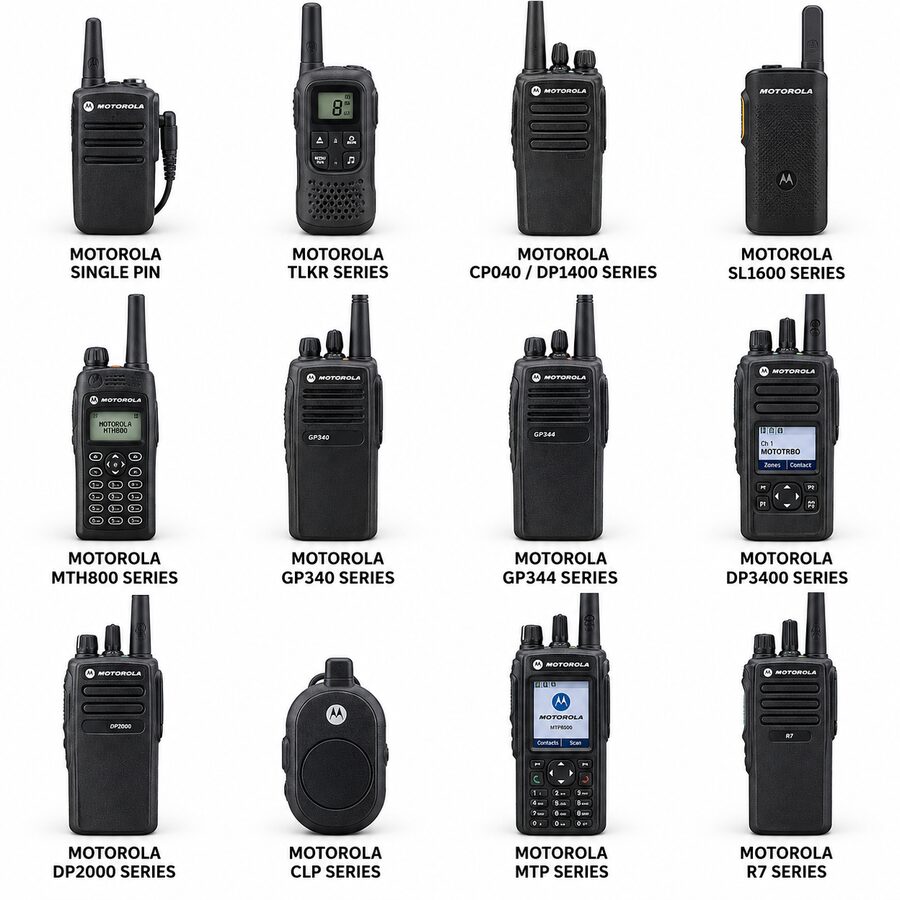
Examine the gold contacts on your earpiece plug for any signs of oxidation or dirt. You can clean these contacts using a lint-free cloth and a small amount of isopropyl alcohol to ensure a perfect connection. Pay close attention to “Pin Recess,” a common mechanical failure where a spring-loaded pin fails to pop back into place after being compressed. This is particularly vital for certain models like the Motorola DP1400. The DP1400 connector requires specific alignment and a secure screw-down to maintain audio fidelity. If the pins are misaligned or recessed, the audio will immediately become muddy or drop out entirely.
Signs of a Blown Transducer
The transducer is the small speaker responsible for converting electrical signals into sound. Over time, these components can suffer from “transducer fatigue” or become “blown” due to excessive volume levels. If you hear rattling sounds during high-volume transmissions, the internal diaphragm is likely damaged. A failing transducer causes a permanent loss of high-frequency clarity amongst all transmissions, making voices sound unintelligible. Unlike a blocked tube, a blown transducer cannot be cleaned or repaired. If the internal speaker has reached the end of its lifespan, a full replacement of the earpiece is the only way to restore the crystal-clear communication required for professional duty.
Best Practices to Prevent Muffled Audio Whilst on Shift
Maintaining your equipment effectively ensures you never have to ask why is my radio earpiece muffled during a critical operation. Prevention is always more efficient than emergency troubleshooting. Most audio issues stem from cumulative wear and tear that could be avoided with better kit management. Professionals who treat their communication gear with the same respect as their primary duty tools experience significantly fewer failures on the frontline.
Start by organising your cables using the provided clothing clips. Snagging a loose wire on a door handle or a subject’s clothing doesn’t just pull the ear tip out; it creates microscopic internal wire breaks. These breaks lead to intermittent, muffled sound that is impossible to fix without a full replacement. Additionally, be mindful of chemical contaminants. Products like hairspray, perfume, or aftershave contain oils and alcohols that can degrade the plastic of the acoustic tube or clog the fine mesh filters inside the transducer housing.
For those working long or consecutive shifts, we recommend rotating between two earpieces. This allows moisture from condensation or sweat to evaporate completely between uses, preventing the “bubble” effect discussed earlier. If you find your current equipment is starting to fail despite these efforts, Shop our professional range of earpieces to ensure your communication remains reliable.
The Daily Maintenance Routine
Perform a 30-second inspection before every shift starts. Check the “Screw-In” or “Twist-Lock” connections to ensure they haven’t vibrated loose during transit or previous use. A loose connection is a primary cause of static and muffling. After your shift, wipe down the ear tip with a sanitising wipe. This simple habit prevents the wax accumulation that eventually blocks the audio path. It also maintains the structural integrity of the silicone tip, preventing it from becoming slippery or loose.
Correct Storage Techniques
Avoid the common mistake of wrapping your earpiece tightly around the radio handset. This “Cable Wrap” method puts immense pressure on the connector pins and causes permanent kinking in the acoustic tube. Instead, store your gear in a cool, dry pouch. Keeping the tube in its natural shape prevents the plastic from developing “memory” kinks that restrict airflow and muffle sound. Always keep a set of spare ear tips in your kit bag to handle emergencies without needing to leave your post.
When to Upgrade: Selecting the Right Replacement Earpiece
There comes a point where troubleshooting reaches its limit. If you have followed every maintenance step and still find yourself asking why is my radio earpiece muffled, the internal components have likely suffered terminal wear. Whilst a replacement tube or ear tip is a cost-effective fix for physical blockages, a failing transducer or compromised internal wiring requires a full hardware upgrade to ensure your safety whilst on duty. Continuing to use unreliable gear puts you and your team at risk during critical incidents.
Selecting the right replacement involves balancing your specific radio brand with your operational environment. It is vital to match the earpiece to your handset, whether you require an Acoustic Tube Earpiece for Motorola Radios or a D-Shape Earpiece for Hytera Radios. Using the correct connector ensures the impedance matches perfectly, preventing the distorted or thin audio common with “universal” unbranded alternatives. Professional-grade replacements are built to withstand the rigours of daily shifts, offering a level of longevity that cheap imitations simply cannot match.
Selecting Your Next Earpiece
Acoustic tubes are the industry standard for discreet communication, providing a low-profile look whilst delivering audio directly into the ear canal. This covert design is ideal for close protection and high-end security environments where visibility must be kept to a minimum. For personnel in active roles, such as door supervisors or event staff, the D-shape and G-Shape Earpiece for Kenwood Radios offer superior mechanical durability and stay secure during physical movement. Earpiece Hub provides specialist adapters for any radio model.
Why Quality Matters for Audio Clarity
Investing in professional-grade equipment is the only way to guarantee long-term reliability. High-quality transducers are engineered to prevent the “muffled” effect from the start, using premium diaphragms that handle high-volume transmissions without distorting. Cheap, unbranded alternatives often use inferior copper and thin plastic shielding, which leads to audio cut-outs and signal degradation within weeks. Reinforced cabling and gold-plated pins are standard in specialist equipment, ensuring your communication remains crystal clear throughout every shift.
Browse our range of professional earpieces at Earpiece Hub
Restore Your Professional Communication Standards
Identifying the root cause of audio failure is the first step toward reclaiming clear communication. Whether you’ve performed a successful isolation test or cleared a stubborn blockage from an acoustic tube, your focus should remain on reliability. These professional fixes address the core reasons why is my radio earpiece muffled, ensuring you never miss a critical transmission whilst on duty. Consistent maintenance keeps your gear functional; however, knowing when to replace worn components is equally vital for your safety.
When maintenance is no longer sufficient, trust a partner that understands the high-stakes nature of security and radio communication. Earpiece Hub has served as a UK-based specialist since 2015, offering expert support for Motorola, Hytera, and Kenwood equipment. With next-day shipping available nationwide, we ensure your replacement gear arrives exactly when you need it. Don’t compromise your performance with unreliable equipment.
Find your perfect replacement earpiece at Earpiece Hub today
Your safety depends on clear audio; don’t settle for anything less than crystal-clear communication during your next shift. Stay sharp and stay connected.
Frequently Asked Questions
Can I use a pin or needle to clear earwax from my earpiece?
No, you should never use sharp objects like pins or needles to clear blockages. These tools can easily puncture the sensitive transducer diaphragm or push the wax deeper into the elbow joint, causing permanent damage. Instead, use a dedicated cleaning wire or a gentle burst of compressed air to safely remove debris. If the wax is stubborn, remove the ear tip and wash it separately in warm, soapy water.
How often should I replace the clear acoustic tube?
You should aim to replace your acoustic tube every three to four months for optimal performance and hygiene. Over time, the plastic naturally becomes brittle, discoloured, or yellowed due to UV exposure and skin oils. This degradation reduces the tube’s flexibility and can lead to microscopic cracks that muffle your audio. If you work daily shifts in demanding environments, more frequent replacements ensure your communication remains crystal clear.
Why does my earpiece sound muffled only when I am outside?
This issue is almost always caused by rapid temperature changes leading to condensation. When your body heat meets the cold external air, moisture droplets form inside the tube and create an acoustic barrier. This is a common reason why is my radio earpiece muffled during winter patrols or outdoor events. Using the flick test to clear the moisture or rotating between two earpieces during your shift will solve this environmental problem.
Will a muffled earpiece damage my two-way radio?
A muffled earpiece is unlikely to cause immediate damage to your radio, but it can lead to long-term issues. If the muffling is caused by a short circuit in the cable, it can put unnecessary strain on the radio’s audio amplifier. Additionally, users often turn the radio volume to maximum to compensate for poor audio, which can lead to speaker fatigue. It’s better to fix the accessory than risk wear on your expensive handset.
Is it possible to fix a muffled microphone on my earpiece?
You can often fix a muffled microphone by clearing the small pinhole opening on the mic housing. Dust, pocket lint, or even moisture can block this port and prevent your voice from reaching the internal sensor. Use a soft, dry brush to gently clear the area. If the muffling is caused by internal component failure or a damaged wind-shielding foam, a full replacement of the wiring loom is usually the most reliable solution.
Do different ear tips affect the sound quality and clarity?
Yes, the style of ear tip you choose significantly impacts how you hear transmissions. Mushroom-style tips provide a tight seal that enhances bass and blocks out background noise, but they are more prone to wax blockages. Open-ear inserts, such as the semi-custom earmoulds, allow ambient sound to enter the ear whilst maintaining clear radio audio. Choosing the right tip for your specific environment is essential for maintaining high-fidelity communication.
What is the best way to remove condensation from inside the tube?
The most effective method is to disconnect the acoustic tube from the transducer and use a canister of compressed air to blow the moisture out. If you’re on duty without tools, you can use the flick test by swinging the disconnected tube in a wide arc. This uses centrifugal force to move the droplets toward the ear tip. Always ensure the tube is completely clear and dry before you reconnect it to the electronics.
Why do Kenwood earpieces sometimes sound muffled on Motorola radios?
Muffled audio between different brands is usually caused by an impedance mismatch or slightly different pin configurations. Even when using an earpiece adapter for any radios, the electrical resistance might not perfectly match what the Motorola audio processor expects. This results in a “thin” or distorted sound profile. For the best results, always use accessories specifically engineered for your radio’s circuitry to avoid these common compatibility issues.
