




Uncategorized
Troubleshooting Radio Earpiece Audio: The Professional Maintenance Guide
Sep
Most professional radio earpieces aren’t actually broken when they stop working; they’re simply neglected. It’s incredibly frustrating when you’re in the middle of a critical shift and find yourself struggling with muffled sound or intermittent signals. You shouldn’t have to tolerate unintelligible messages when your team’s safety and coordination are on the line. Mastering the art of troubleshooting radio earpiece audio can save your equipment from the bin and ensure your communications remain crystal clear.
We understand that reliable gear is the backbone of professional security. This specialist maintenance guide provides the technical expertise needed to diagnose common faults, such as acoustic tube blockages caused by moisture or debris. By following these steps, you’ll restore immediate audio clarity and extend the lifespan of your communications kit. We’ll explore essential cleaning routines, technical checks, and the specific signs that indicate when a replacement is finally necessary. It’s time to transform your approach to gear maintenance and keep your team connected when it matters most.
Key Takeaways
- Learn how to distinguish between simple debris blockages and terminal hardware failure by diagnosing specific audio symptoms like crackling or muffled output.
- Master the essentials of troubleshooting radio earpiece audio using basic cleaning techniques to remove moisture and earwax from acoustic tubes.
- Discover how regular maintenance and the use of replacement ear tips can significantly extend the operational life of your professional communication gear.
- Recognise the signs of irreversible wire fatigue and understand when it is more cost-effective to upgrade to specialist 2-wire or 3-wire surveillance systems.
Identifying Common Audio Faults in Two-Way Radio Earpieces
Effective communication relies on understanding your hardware. When troubleshooting radio earpiece audio, you must first categorise the specific failure rather than simply discarding the unit. A frequent issue is the “Silent Radio” phenomenon. This occurs when the radio’s internal switch remains stuck, making the device behave as if a headset is permanently connected. This prevents the internal speaker from firing even after you’ve unplugged your gear. Understanding the foundations of two-way radio technology helps professionals identify whether these faults are electronic or purely mechanical. Identifying the root cause early ensures your team stays connected during critical shifts.
Muffled vs. Crackling Audio: What the Sound Tells You
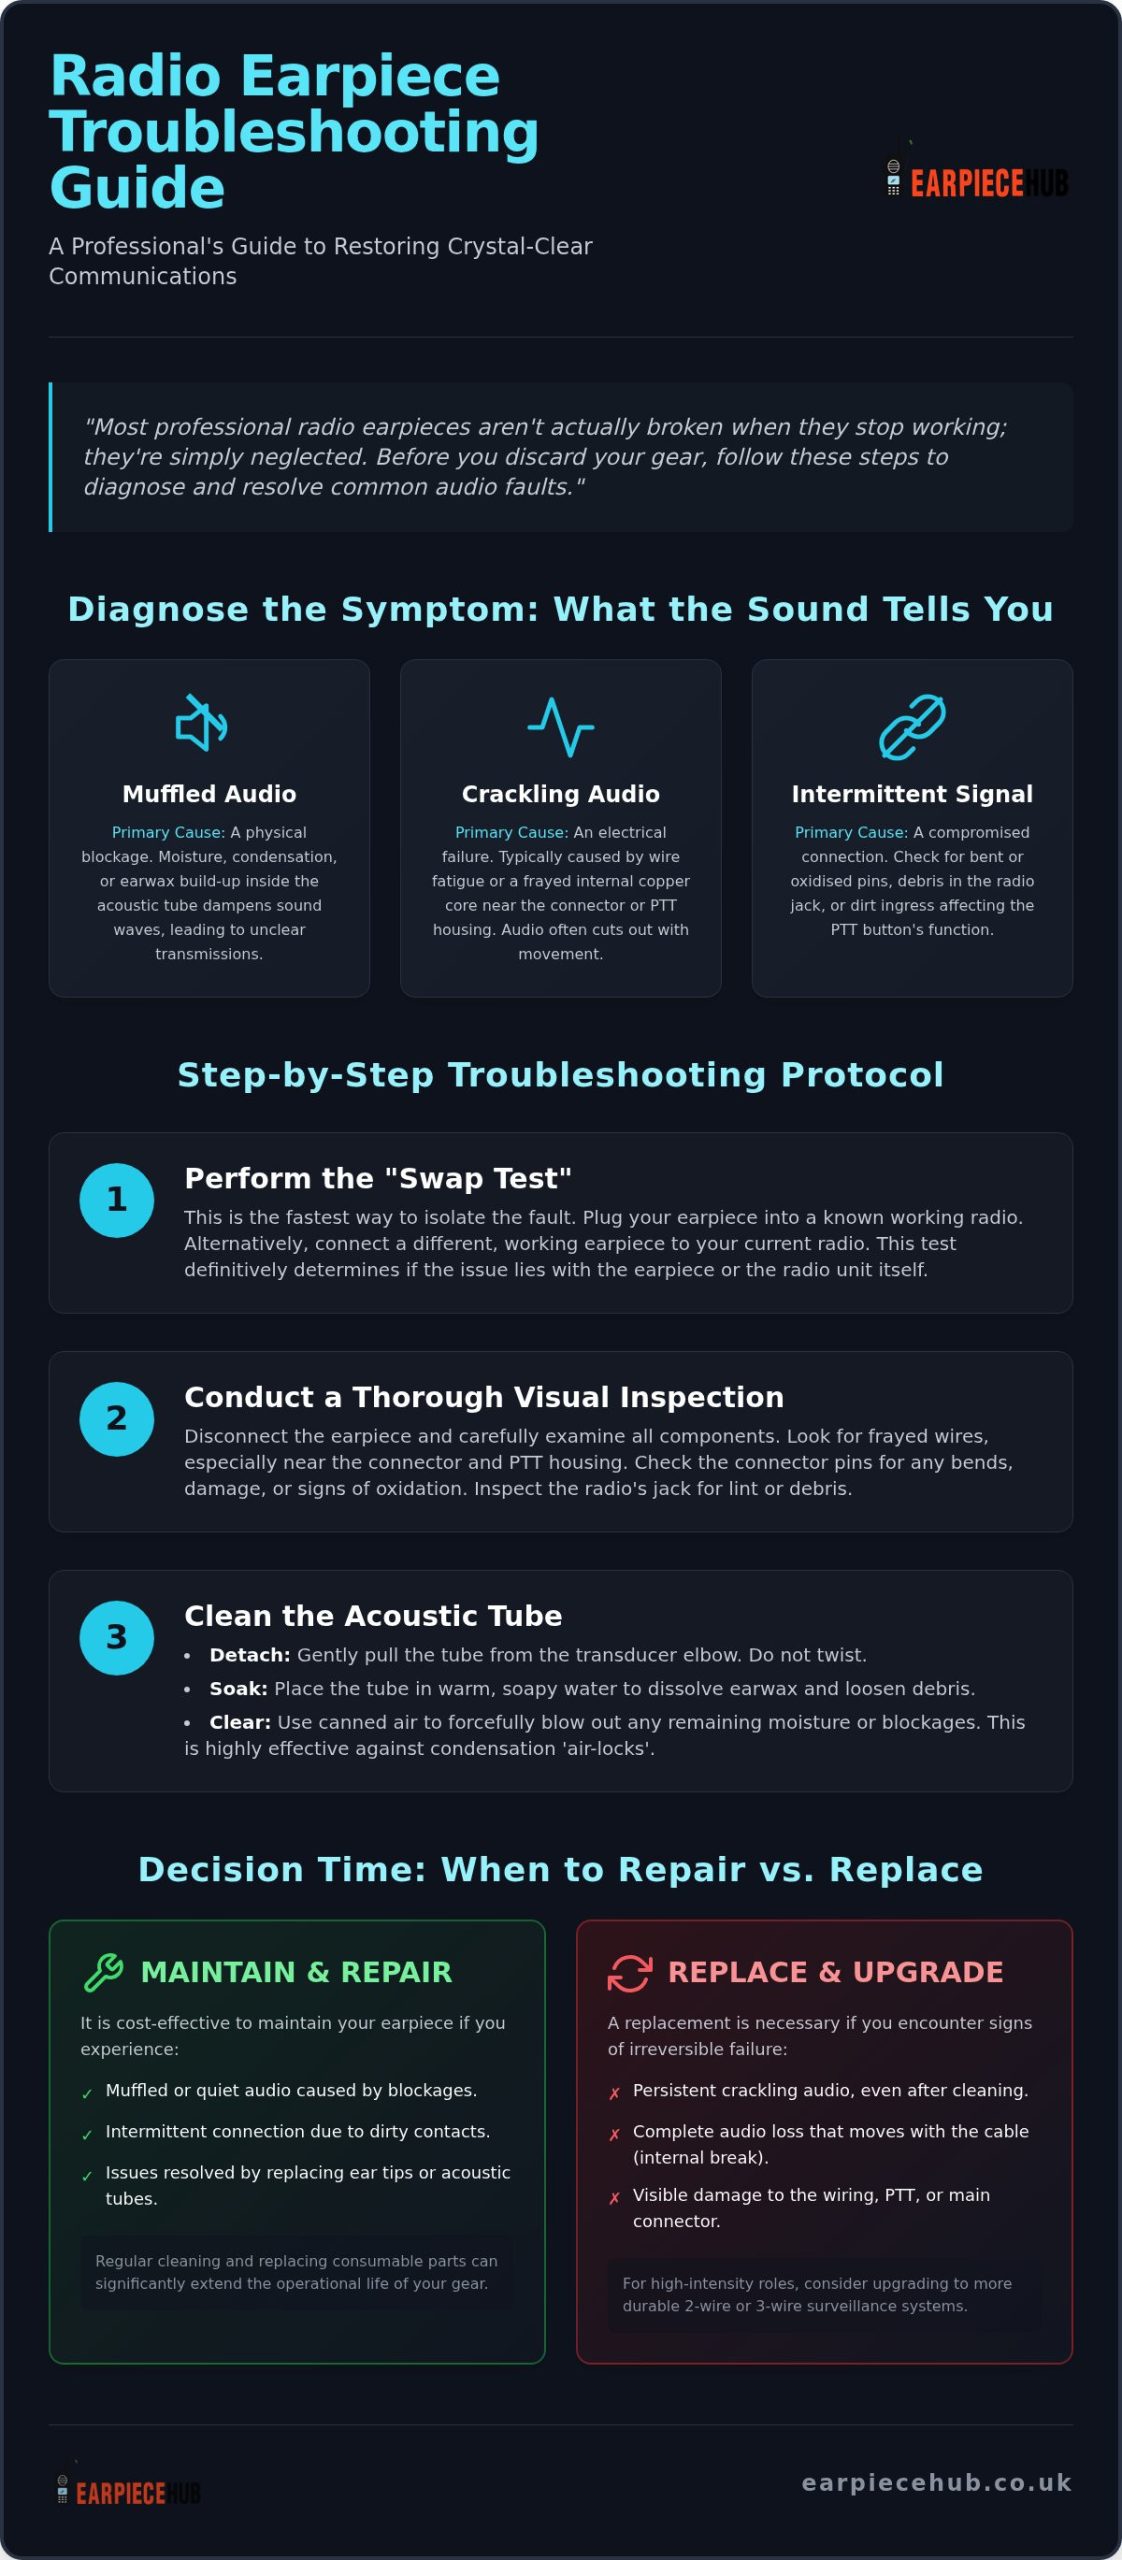
The quality of the sound provides a direct clue to the cause. Muffled audio almost always points to a physical blockage. Over time, moisture or earwax accumulates within the acoustic tube, dampening sound waves. By comparison, crackling indicates electrical failure. This typically stems from wire fatigue near the connector or PTT housing. If audio breaks up when you move, the internal copper core is likely fraying and requires replacement.
Intermittent Connection Issues
Intermittent signals are a major operational risk. Test your gear by gently rotating the plug whilst the radio is on. If the audio fluctuates, the connection is compromised. Inspect pins for bends or oxidation and check the jack for debris. If your PTT button feels “mushy”, it’s often due to dirt ingress. Professional troubleshooting radio earpiece audio requires a methodical approach to these small contact points.
The Science of Silence: Why Acoustic Tubes and Connectors Fail
Professional communication failure is rarely a mystery of complex electronics. It’s usually a result of physical environment and human biology. When troubleshooting radio earpiece audio, you’ll find that even the most resilient gear faces two primary enemies: moisture and debris. These factors create physical barriers that sound waves simply cannot penetrate, leading to the “dead” earpiece syndrome many security professionals face during long shifts. Understanding these mechanics is vital for maintaining equipment longevity.
Moisture and Condensation in Acoustic Tubes
Temperature fluctuations are the leading cause of acoustic tube failure. When moving between a warm indoor centre and a cold outdoor patrol, moisture condensation forms inside the narrow air canal. This isn’t just dampness; it’s a physical droplet that creates an air-lock. Because sound in these systems travels via air pressure, a single water droplet acts as a solid wall. You’ll hear nothing until the tube is cleared. Similarly, earwax build-up on the internal mesh of the ear tip creates a secondary barrier that slowly muffles incoming transmissions until they’re unintelligible.
Connector Pin Alignment and Dirt
The electrical side of failure often happens at the radio interface. Motorola 2-pin and multipin connectors are particularly vulnerable to pocket lint and dust. Even a microscopic layer of oxidisation on the metal pins degrades the electrical contact. In high-movement roles, constant cable strain leads to the “internal break” phenomenon. This is where the outer jacket looks perfect, but the copper core is severed. A slight bend in a pin or a tiny piece of debris in the jack can cause a total blackout. Keeping a stock of replacement acoustic tubes and ear tips is the most efficient way to combat these environmental hazards before they compromise your shift.
Step-by-Step Troubleshooting for Clearer Communication
When a transmission fails during a shift, don’t panic. The first rule is to disconnect the earpiece and inspect all visible components for obvious damage. Performing a “Swap Test” is the fastest way to isolate the fault. Simply plug your earpiece into a known working radio, or try a different earpiece on your current handset. If the problem persists with a different earpiece, the issue lies with the radio unit itself. This methodical approach is the core of troubleshooting radio earpiece audio in high-pressure environments. Reliable communication is built on these simple, disciplined checks.
Restoring Your Acoustic Tube
Detach the tube from the transducer by gently pulling it away from the plastic elbow. Avoid twisting the material, as this can damage the airtight seal required for clear sound. Soak the tube in warm soapy water to loosen earwax and debris that has accumulated inside. For immediate results, use canned air to blow out moisture and blockages. Canned air is a security professional’s best friend for removing the “air-lock” droplets mentioned earlier. Ensure the tube is completely dry before reconnecting to prevent water ingress into the electronic transducer housing.
Cleaning Electrical Contacts Safely
Dull or blackened connector pins indicate oxidisation. You can brighten these contacts using an alcohol-based cleaner and a lint-free cloth. For stubborn build-up, a simple pencil eraser works wonders to gently polish the pins back to a shine. Check the radio port for pocket lint or dust using a non-metallic pick. Once clear, re-seat the connector firmly to ensure a solid electrical path. Consistent maintenance prevents the intermittent signals that compromise team safety. If your gear is beyond a simple clean, you can shop now for replacement parts to restore your communication kit with minimal fuss.
When to Repair vs Replace: Choosing Your Next Professional Earpiece
Persistent issues often signal that troubleshooting radio earpiece audio has reached its limit. Terminal wire fatigue occurs when the internal copper core frays beyond the reach of a simple cleaning routine. If you notice exposed wiring or frayed outer casing near the strain relief points, the unit is no longer reliable. Professional troubleshooting radio earpiece audio requires knowing when to stop repairing and start replacing. At this stage, a new unit is the only way to guarantee team safety during critical operations.
Signs Your Earpiece Has Reached End-of-Life
Visual inspections are your best diagnostic tool. Check the cable’s flexibility; if it feels stiff or shows visible cracks, the internal shielding is compromised. Failed PTT springs are another clear indicator. If the button sticks or no longer provides a tactile “click” when pressed, the internal mechanism is worn out. These physical failures lead to the intermittent audio issues discussed earlier, making messages unintelligible when coordination is most vital. Don’t risk a communication blackout by clinging to hardware that has passed its functional peak.
Selecting the Right Replacement from the Hub
Upgrading your kit provides an opportunity to improve operational efficiency. Whilst 1-wire systems are standard, moving to a 2-wire or 3-wire surveillance system offers better control. A 2-wire kit separates the PTT and microphone, whilst a 3-wire system provides maximum discretion for covert work. Match the style to your environment: G-shape earpieces offer superior comfort for long shifts, whilst acoustic tubes remain the specialist choice for discretion. Our universal earpieces and adapters can solve compatibility headaches amongst mixed fleets. Don’t forget that audio power depends on your radio’s health; ensure you use high-quality replacement batteries for the Motorola DP1400 to maintain peak performance. Browse our full range of professional Motorola and Kenwood earpieces to find the perfect fit for your team.
Maintain Peak Communication Performance
Reliable communication isn’t just about the hardware you buy; it’s about the discipline you apply to its upkeep. By mastering the basics of troubleshooting radio earpiece audio, you’ve gained the technical skills to clear moisture blockages and polish oxidised connectors before they compromise your shift. These simple maintenance steps ensure your team stays connected when coordination is most critical. Whilst regular cleaning solves most muffled sound issues, recognise that terminal wire fatigue is a clear signal to refresh your kit.
As a specialist UK retailer since 2015, Earpiece Hub provides the expertise and high-grade accessories your team needs to succeed. Whether you require replacement parts or are looking to upgrade your surveillance system for Motorola, Hytera, or Kenwood handsets, we are your central resource. Benefit from our 24/7 Support and Next Day Shipping to keep your operations running without delay. Find your perfect replacement earpiece at Earpiece Hub and ensure your gear is always ready for the next challenge.
Frequently Asked Questions
Why can I hear others on my radio, but they cannot hear me?
This indicates a microphone or PTT failure. Check the wiring near the PTT housing for internal breaks or fraying. If you’re using a 1-wire system, the mic is usually integrated; in 2-wire or 3-wire systems, verify the separate mic connection. Ensure the radio’s accessory port is clear of lint. A poor connection can disable the transmit path whilst leaving the receive path active, resulting in one-way communication.
How often should I clean or replace my acoustic tube?
Clean your acoustic tube weekly and replace it every three to six months depending on usage. Professionals in high-intensity environments or outdoor patrols require more frequent replacements due to rapid moisture build-up. Regular maintenance is a core part of troubleshooting radio earpiece audio. It prevents the air-lock effect caused by condensation and ensures consistent clarity. Keeping fresh spares in your kit avoids unexpected communication failures during critical shifts.
What is the best way to clean earwax out of a radio earpiece?
Detach the ear tip and acoustic tube from the transducer first. Soak the silicone tip and tube in warm, soapy water for ten minutes to loosen debris. Use a soft brush or a non-metallic pick to gently remove stubborn wax from the ear tip mesh. Always ensure every component is completely dry before reassembly. This prevents moisture from entering the sensitive electronic transducer housing and causing permanent damage.
Why is my radio earpiece making a constant buzzing or static noise?
Constant buzzing usually stems from electromagnetic interference or a compromised shield in the cable. If the noise changes when you move the wire, you likely have an internal break. Ensure your radio battery is fully charged. Low power often causes signal instability and static. If you use a Motorola DP1400, check that you are using a high-quality replacement battery to provide a steady voltage for the audio circuits.
Can I use a Motorola earpiece with a Kenwood radio using an adapter?
You can use cross-brand equipment by employing a specialist earpiece adapter. These adapters bridge the gap between different pin configurations, such as Motorola’s 2-pin and Kenwood’s K1 connector. Whilst adapters provide flexibility for mixed fleets, ensure the adapter is firmly seated to prevent signal loss. For the best audio quality, we recommend using universal earpieces designed to work seamlessly with various professional radio brands without needing extra connectors.
