




Uncategorized
Push-to-Talk Earpieces: Professional Two-Way Radio Guide
Jul
What if the weakest link in your security operation is a simple piece of plastic and wire? It’s a harsh reality when a budget push-to-talk earpiece microphone fails at the exact moment a critical instruction is issued. You’ve likely dealt with the irritation of audio cutting out or the physical toll of an uncomfortable earbud during a long shift. Confusion over multi-pin connectors versus single-pin jacks shouldn’t compromise your team’s safety.
At Earpiece Hub, we know that reliable communication relies on technical precision. This guide helps you master the nuances of PTT earpieces to ensure crystal-clear audio and lasting durability for your professional fleet. We’ll explore the essential differences between 1-wire, 2-wire, and 3-wire configurations whilst providing expert advice on the best setup for your specific role. From acoustic tubes for Motorola to specialised Hytera connectors, you’ll learn how to configure a system that survives daily professional use. With our focus on technical expertise and next day shipping, we’re here to ensure your gear never lets you down when it matters most.
Key Takeaways
- Understand why a mechanical push-to-talk earpiece microphone is essential for professional teams to eliminate the risks of accidental VOX transmissions.
- Learn to balance audio isolation with situational awareness by choosing between acoustic tubes, D-shape, or G-shape designs based on your specific environment.
- Ensure seamless compatibility across mixed radio fleets by matching technical specifications and utilising universal earpiece adapters.
- Maximise equipment longevity with expert maintenance techniques that can restore audio levels and clear blocked acoustic tubes without requiring new hardware.
Understanding Push-to-Talk (PTT) Earpiece Architecture
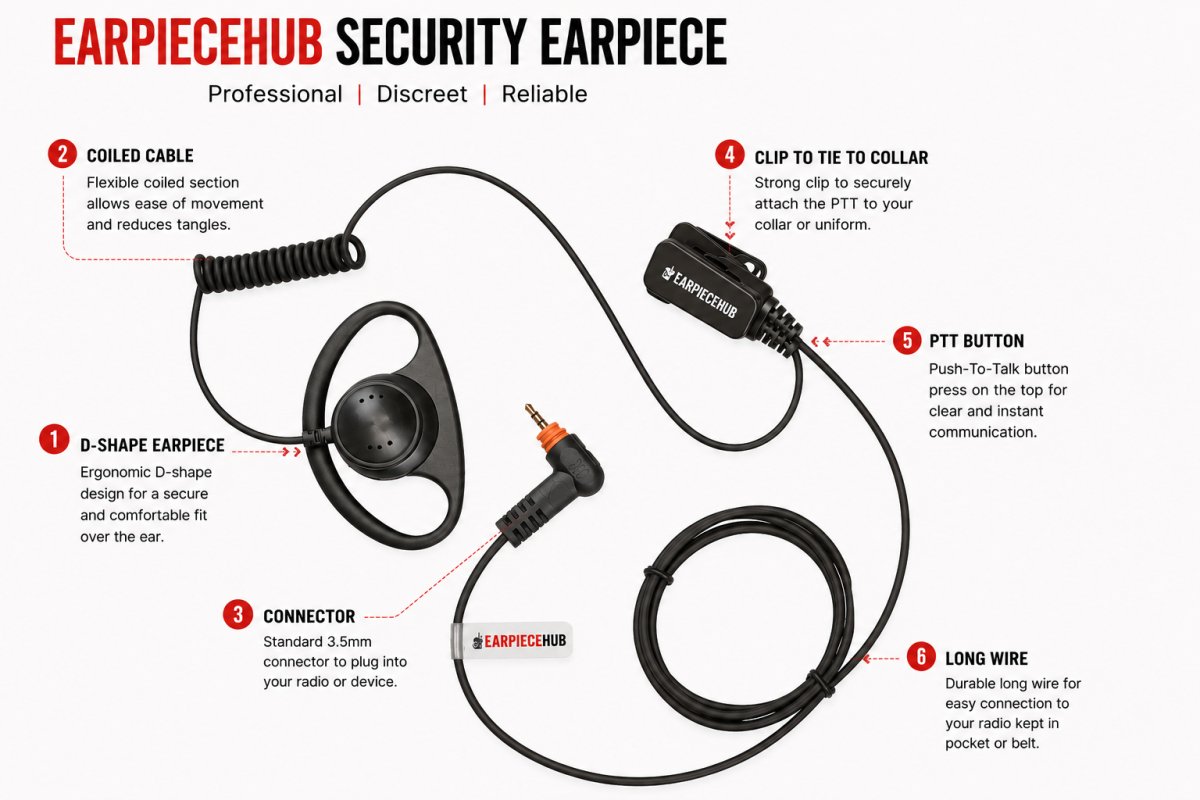
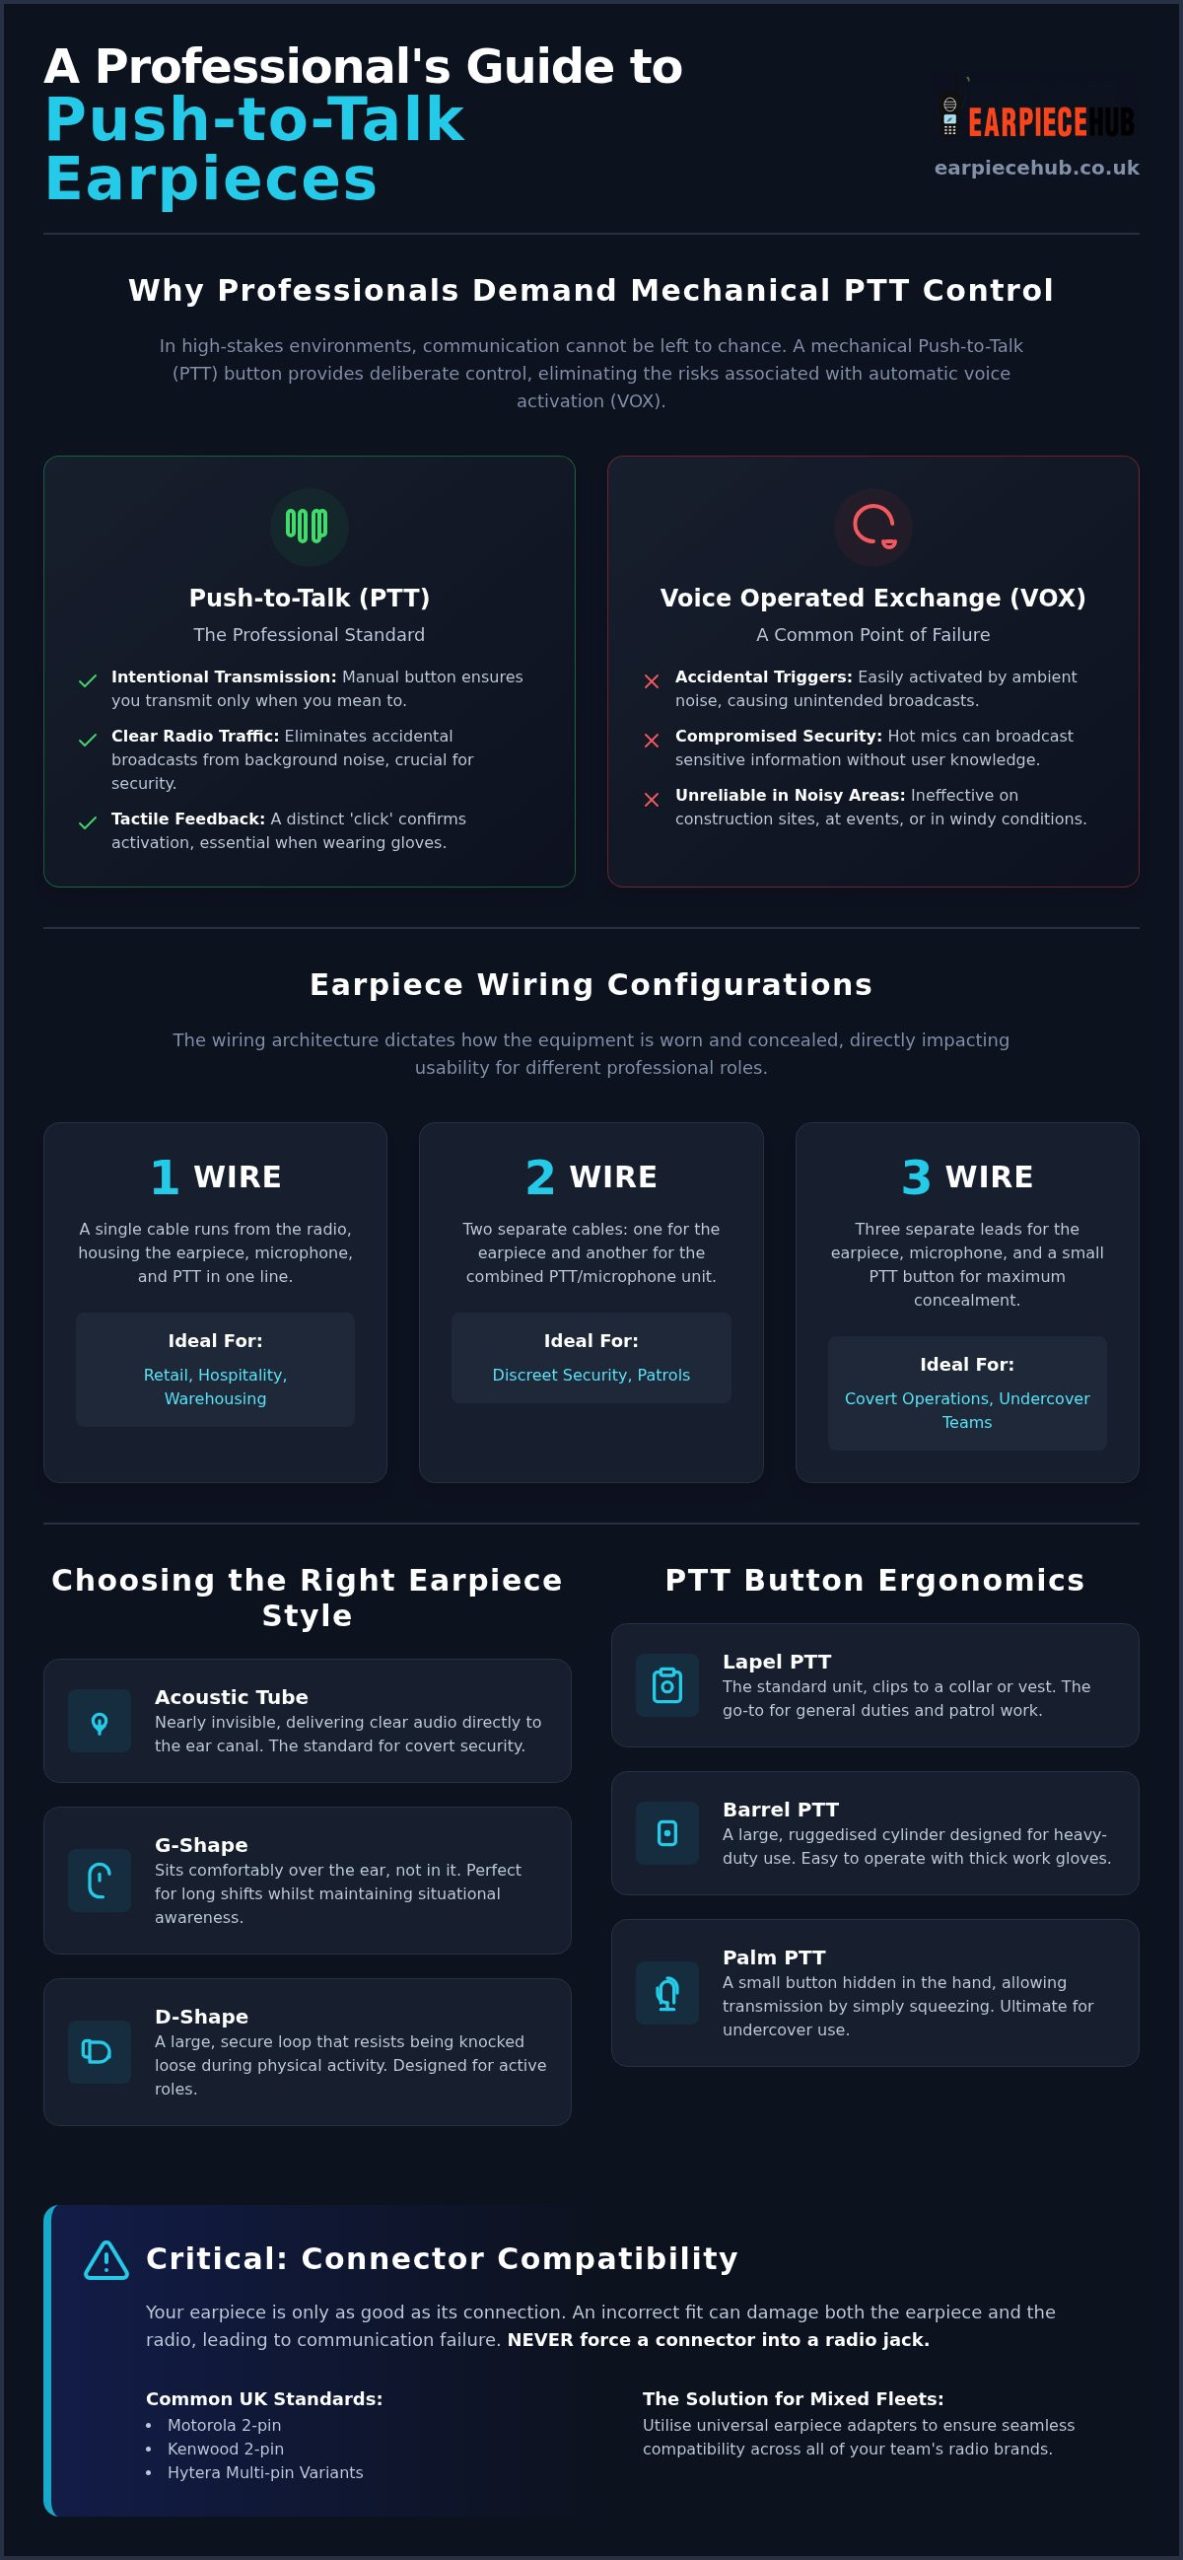
A Push-to-talk (PTT) earpiece microphone is a hardware interface designed for instant, half-duplex communication. Unlike consumer headsets, these devices use a mechanical button to open the transmission channel. This manual control is superior to Voice Operated Exchange (VOX) in professional settings. VOX often triggers accidental transmissions in noisy environments, which clutters radio traffic and compromises security. A dedicated push-to-talk earpiece microphone ensures your voice is only heard when you intend it to be.
Precision matters during high-stakes operations. Professional-grade buttons provide distinct tactile feedback. This is essential for security or construction teams who often work whilst wearing gloves. You need to feel the “click” to confirm the mic is active. Additionally, the microphone housing plays a vital role. High-quality casings are engineered to shield the transducer from wind and ambient noise, ensuring your message remains clear even on a blustery building site or in a crowded event centre.
The demand for technical precision in hardware interfaces extends beyond audio; for example, MindRove develops high-performance neural interfaces that push the boundaries of human-machine interaction in research and development.
1-Wire, 2-Wire, and 3-Wire Systems Explained
Choosing the right wiring architecture for your push-to-talk earpiece microphone depends on your operational needs. These configurations dictate how you wear and conceal the equipment:
- 1-Wire: The simplest configuration. A single cable runs from the radio to the PTT/microphone unit, with the earpiece attached directly above it. It’s ideal for retail and hospitality where covert use isn’t required.
- 2-Wire: This setup features two separate cables. One leads to the earpiece, whilst the other houses the PTT and microphone. This allows you to thread the mic down a sleeve, making it a favourite for discreet security work.
- 3-Wire: The ultimate choice for covert operations. It uses three separate leads for the earpiece, the microphone, and a small PTT button that can be hidden in the palm of your hand.
The Importance of Connector Compatibility
Your earpiece is only as good as its connection. Common UK standards include Motorola 2-pin, Kenwood 2-pin, and Hytera multi-pin variants. Whilst some connectors look similar, pin spacing and diameter vary between brands. Never force a connector into a radio jack. If it doesn’t click into place easily, it’s likely the wrong fit. Using an earpiece adapter is a better solution for teams managing a mixed fleet of radio brands.
Choosing the Right Earpiece Microphone for Your Environment
Selecting the correct push-to-talk earpiece microphone involves more than just picking a brand. You must balance the need for audio isolation with essential situational awareness. For example, a door supervisor requires clear radio traffic whilst remaining alert to verbal cues or threats from the public. In high-decibel environments like music festivals, noise-cancelling microphone elements are vital to filter out background roar. If your team operates near speaker stacks or heavy machinery, a standard mic won’t suffice. Many of these technical standards align with the rigorous requirements found in Mission-Critical Push-to-Talk (MCPTT) systems, ensuring reliability under pressure.
Acoustic Tube vs. G-Shape and D-Shape Designs
The physical form of your earpiece dictates both comfort and discretion. Different roles demand different hardware profiles:
- Acoustic Tube: The industry standard for covert security. The clear tube is nearly invisible and delivers sound directly into the ear canal for maximum clarity.
- G-Shape: A favourite for retail and hospitality. It sits over the ear rather than inside it, offering superior comfort for 12-hour shifts whilst allowing you to hear ambient sounds.
- D-Shape: Designed for active roles. The large loop provides a secure fit that won’t be knocked loose during physical activity or whilst running.
PTT Ergonomics: Lapel, Barrel, and Palm Buttons
The ergonomics of your push-to-talk earpiece microphone can make or break a shift. Button placement dictates how quickly you can respond during an incident.
- Lapel PTT: This standard unit clips to your collar or vest. It’s the go-to for general duties where speed is helpful but discretion isn’t the primary concern.
- Barrel PTT: These are larger, ruggedised cylinders. They’re built for heavy-duty use and are much easier to operate when wearing thick work gloves amongst construction or logistics teams. For those in logistics who require dependable transport, you can explore Yamaha Motorcycle Sales and Authorised Service Services at Premium Motosiklet to find vehicles that match this level of reliability.
- Palm PTT: Found on 3-wire systems, these allow you to transmit by simply squeezing your hand. This is the ultimate setup for undercover personnel who cannot reach for a chest-mounted mic without drawing attention.
Finding the right balance of durability and comfort is easier when you browse universal earpieces and headsets designed for professional use.
Technical Specification and Radio Matching
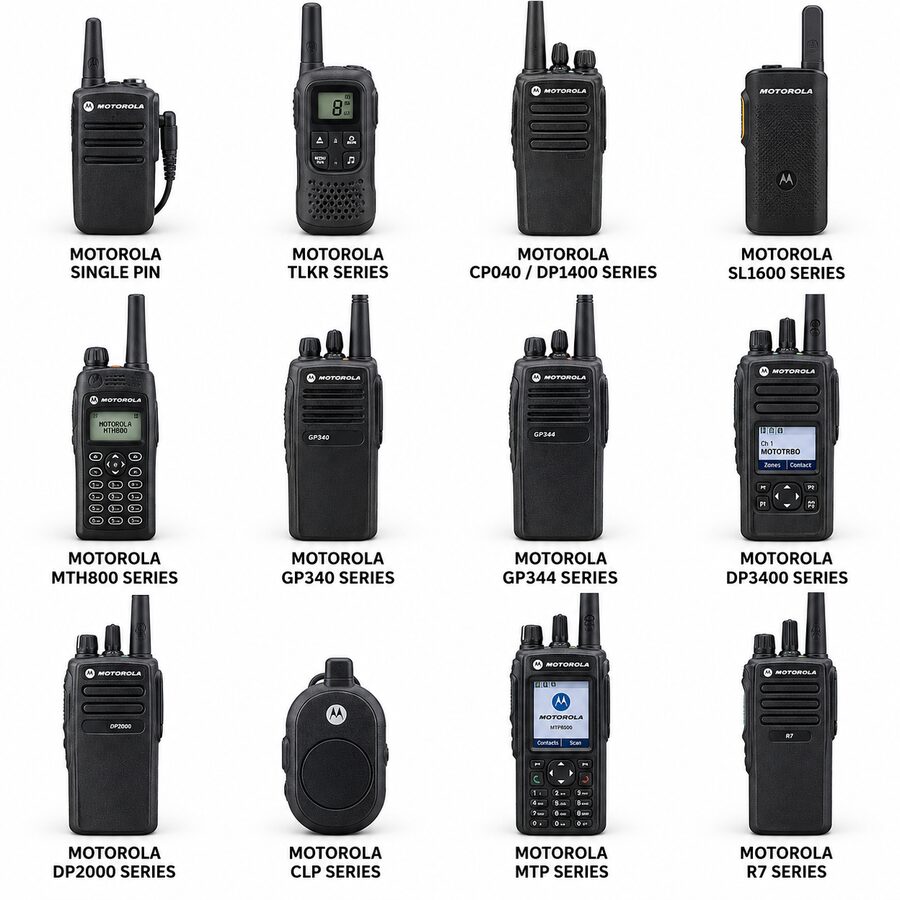
A push-to-talk earpiece microphone must be electrically compatible with your handset to function correctly. Matching an accessory to a Motorola DP1400 requires checking both the pin configuration and the impedance. Licensed radios typically offer higher power outputs than “Licence Free” PMR446 units. This power difference directly affects the audio levels you experience in the earpiece. If your radio battery is failing, audio amplification will drop regardless of your earpiece quality. Ensuring you have a high-quality replacement battery for Motorola DP1400 is essential to drive clear sound throughout a long shift.
Identifying Your Radio Connector
Professional connectors aren’t universal. The M1 (Motorola), K1 (Kenwood), and H1 (Hytera) standards all use different pin spacings and diameters. For high-movement roles, a secure screw-in connector is vital. It prevents the lead from being yanked out during a physical incident. These technical standards are often discussed by the Association of Public-Safety Communications Officials (APCO) when defining reliability for professional communications equipment. Always verify your radio’s port type before purchasing to avoid damaging the internal pins of your handset.
Universal Earpieces and Adapter Solutions
Mixed radio fleets are common in large event centres or multi-site operations. You don’t necessarily need to buy brand-specific hardware for every user. A universal earpiece and headset system allows you to use interchangeable adapters. This approach is more cost-effective than replacing entire units when you upgrade your radio fleet. It ensures your team can keep the high-quality push-to-talk earpiece microphone they find comfortable whilst maintaining full technical compatibility across different radio brands. Investing in premium adapters provides the flexibility required for modern, dynamic security environments.
Maintenance and Longevity of Professional Earpieces
Reliability doesn’t end at the point of purchase. In fact, 90% of earpieces reported as “broken” are actually just suffering from blocked acoustic tubes. Earwax and environmental debris frequently obstruct the sound path, leading to a sudden loss of volume. Before discarding your gear, follow this cleaning process to restore audio levels.
First, detach the clear tube from the transducer. Use a small, soft brush to clear the transducer opening and wash the clear tube in warm, soapy water. Ensure the tube is completely dry before reattaching it. To prevent internal wire fractures in your push-to-talk earpiece microphone, never wrap cables tightly around the radio. Coil them loosely to avoid stress at the connection points. As a specialist UK stockist, Earpiece Hub provides all the replacement ear tips and acoustic tubes you need to keep your equipment in top condition.
Preventing Moisture Build-up in Acoustic Tubes
Condensation often forms inside the clear tube whilst you work. This happens because of the temperature difference between your body and the external air. This moisture creates a “muffled” effect that ruins communication clarity. We recommend using fresh replacement acoustic tubes every 3 to 4 months. This practice ensures both hygiene and consistent audio performance for your entire team.
When to Upgrade Your Communication Gear
Even with perfect maintenance, hardware eventually reaches its limit. Watch for terminal signs like an intermittent PTT response, frayed outer casings, or heavily distorted audio. If your role changes to a high-noise environment, such as a construction site or event centre, it’s likely time to move from an in-ear model to a noise-cancelling overhead headset. This provides the isolation needed for critical messages in loud areas.
Organise your fleet upgrade today with Earpiece Hub for expert support and technical reliability.
Optimise Your Professional Radio Communication
Reliable radio performance depends on more than just your handset. By mastering the technical nuances of wiring architecture and maintaining your acoustic tubes, you ensure your team stays connected when it matters most. Whether you need the discretion of a 3-wire covert system or the all-day comfort of a G-shape design, choosing the right push-to-talk earpiece microphone is a critical operational decision. Proper maintenance and correct connector matching are the foundations of clear, uninterrupted audio.
As specialists in Motorola, Kenwood, and Hytera peripherals, Earpiece Hub provides the expertise needed to keep your fleet running at peak efficiency. We offer UK-based technical support available 24/7 and next-day shipping across the UK to meet your urgent communication requirements. Don’t let a blocked acoustic tube or an incompatible pin connector compromise your security operation. Our team is ready to help you find the perfect configuration for your specific job role.
Shop Professional Push-to-Talk Earpieces at Earpiece Hub today and secure your equipment. With the right gear and a solid maintenance routine, your communication will remain crystal clear through every shift.
Frequently Asked Questions
How do I know if a PTT earpiece is compatible with my Motorola radio?
You can verify compatibility by matching the specific connector code, such as M1 or M2, to your radio’s accessory port. For a Motorola DP1400, you require a standard 2-pin connector with specific pin spacing. Always check the technical specifications of your handset before purchase; if the pins don’t align perfectly with the port, forcing the connection can cause permanent damage to the radio’s internal circuitry.
What is the difference between a 1-wire and a 2-wire earpiece?
The main difference lies in the cable layout, as a 1-wire system combines the microphone and PTT button on a single lead whilst a 2-wire system uses separate cables for each. A 2-wire push-to-talk earpiece microphone is the preferred choice for security personnel because the separate mic lead can be threaded through a sleeve for covert operation. 1-wire systems are more practical for hospitality roles where discretion is less critical.
Why is the audio in my acoustic tube earpiece sounding muffled?
Muffled audio is usually caused by a physical blockage, such as earwax or condensation, trapped inside the clear acoustic tube. Moisture build-up is common during long shifts due to the temperature difference between your body and the air. Detach the tube from the transducer to check for obstructions. If cleaning the tube doesn’t restore the audio levels, it is time to fit a replacement acoustic tube and ear tip.
Can I use a Kenwood earpiece with a Motorola radio using an adapter?
Yes, you can use a Kenwood-style accessory with a Motorola handset by utilising a specialist earpiece adapter. These adapters are designed to bridge the gap between different manufacturer standards, such as the K1 and M1 pin configurations. This is a highly efficient way to manage a mixed fleet of radios without the expense of replacing every push-to-talk earpiece microphone when you switch brands.
How do I clean my push-to-talk earpiece microphone safely?
Clean the electronic housing of your earpiece using a soft, dry brush to remove debris from the button crevices and microphone port. Never use liquids or cleaning sprays directly on the PTT unit as moisture can seep into the internal switch. For the clear acoustic tube, detach it from the transducer and wash it in warm, soapy water. Ensure the tube is completely dry before reattaching it to prevent water damage to the transducer.
